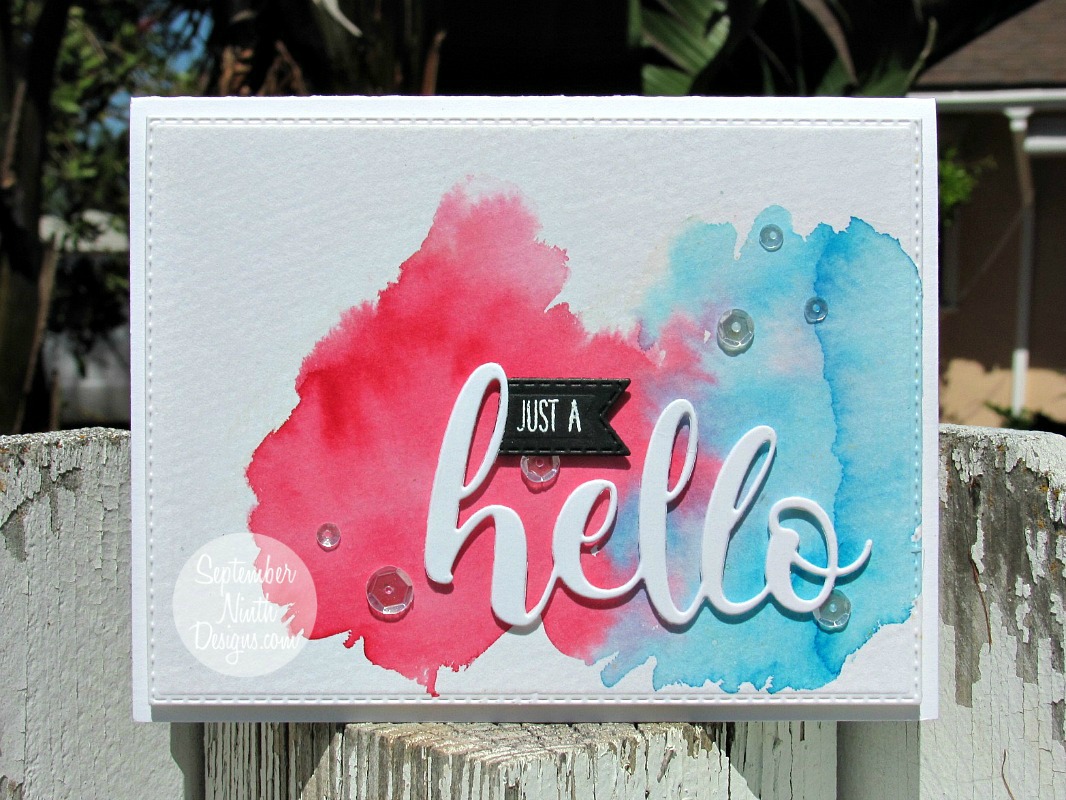
March 31, 2016

Tutorial Thursday

Happy Thursday!!!
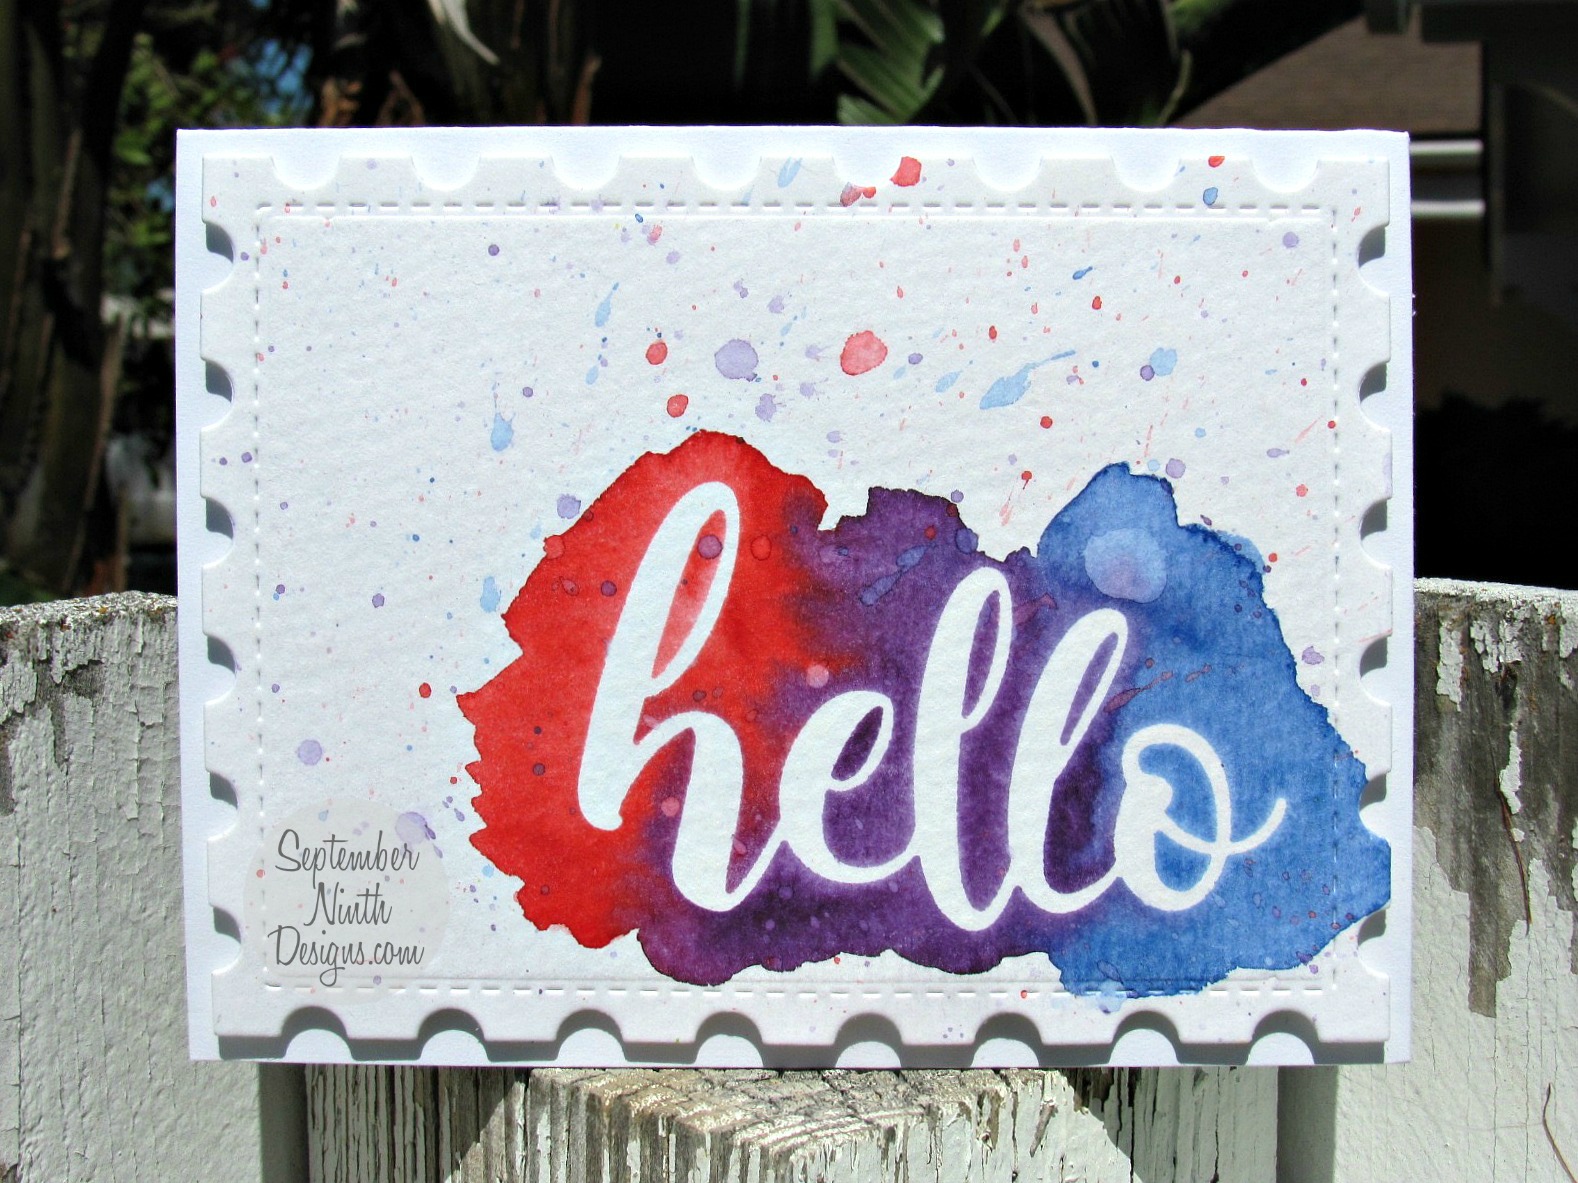
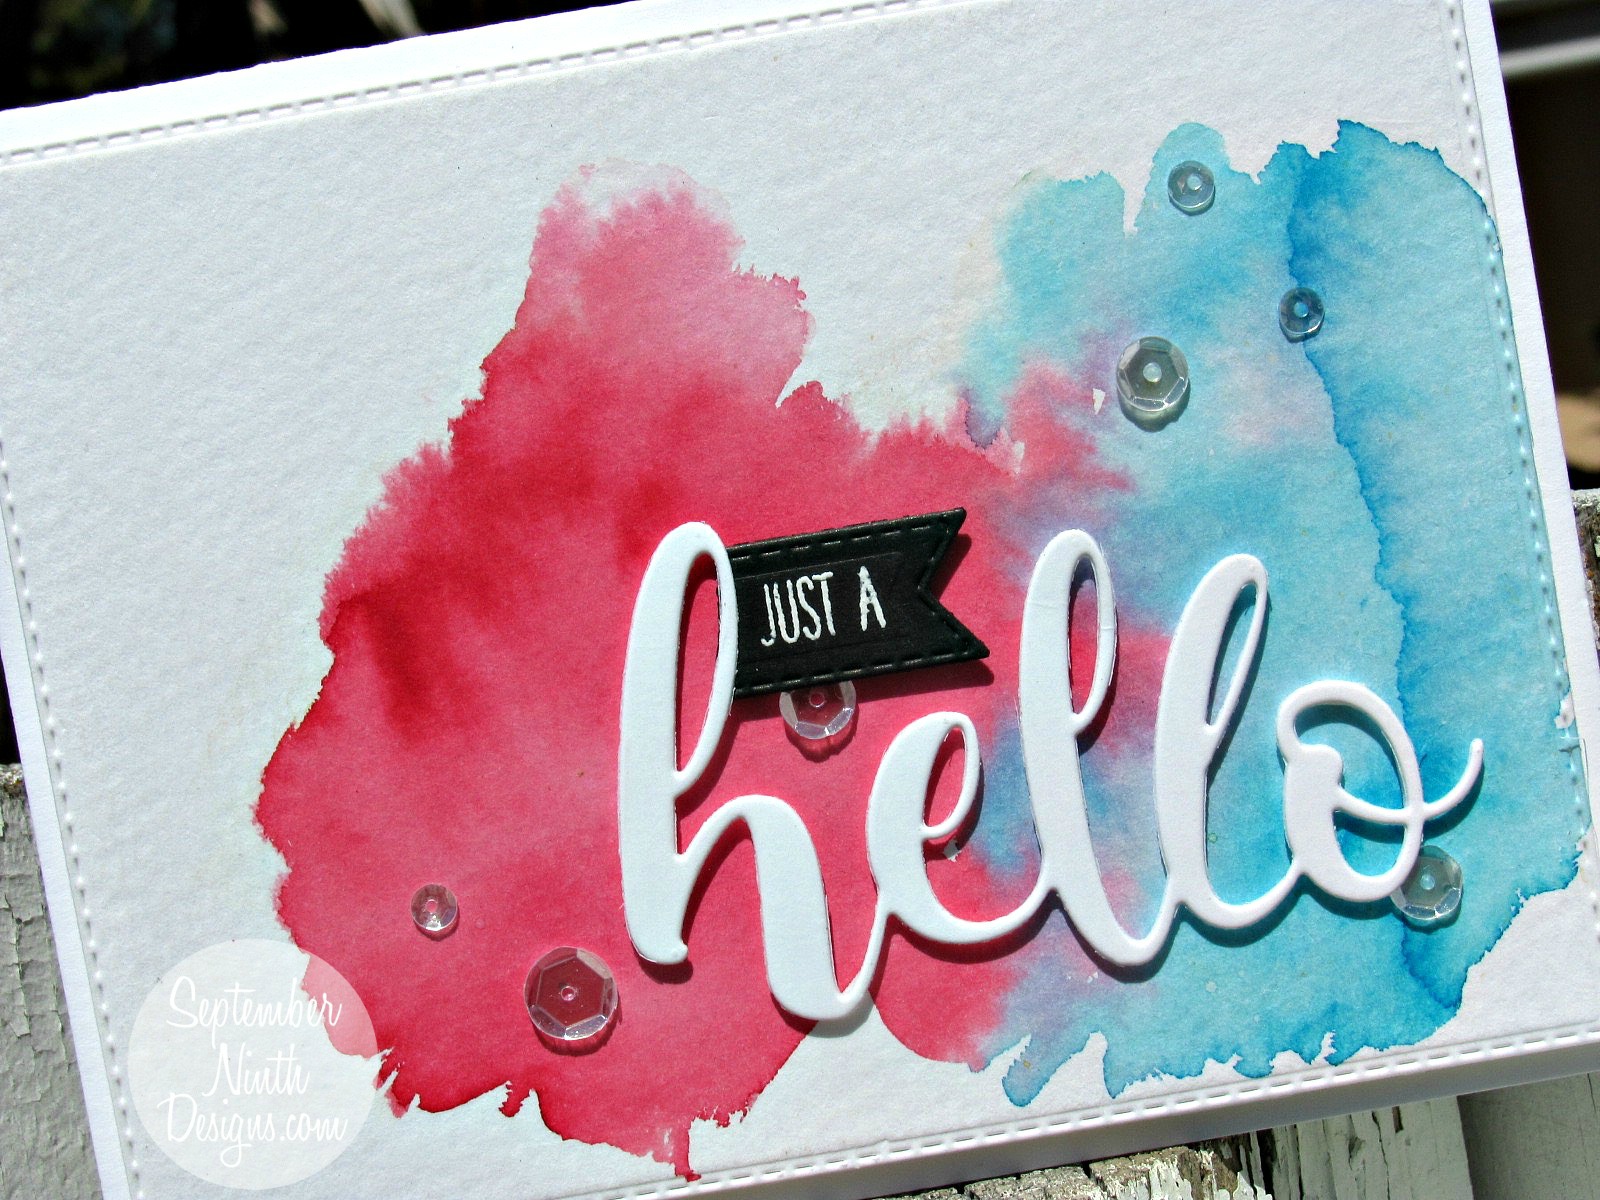
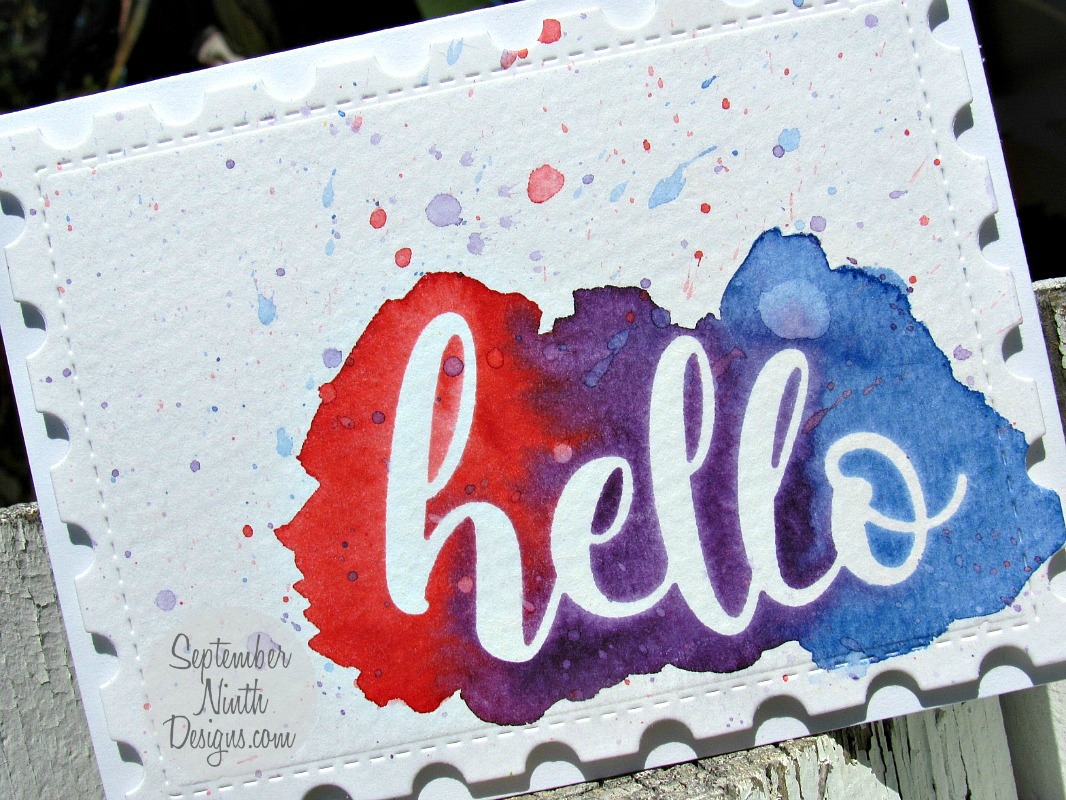
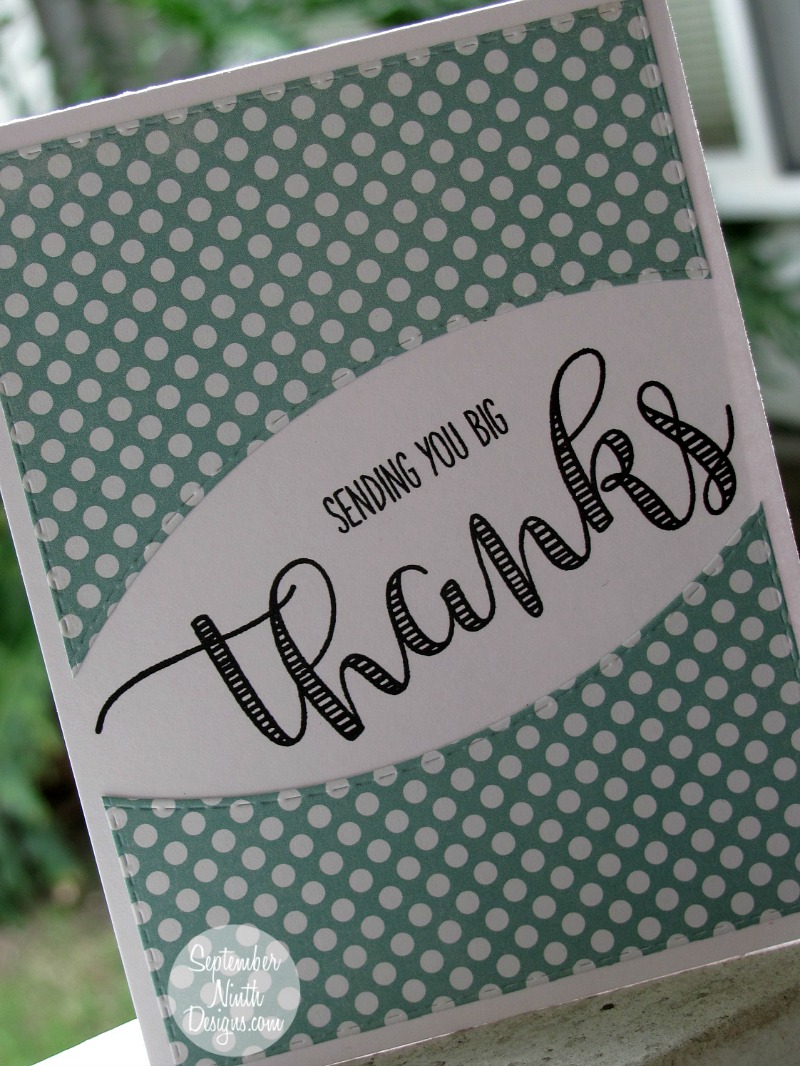
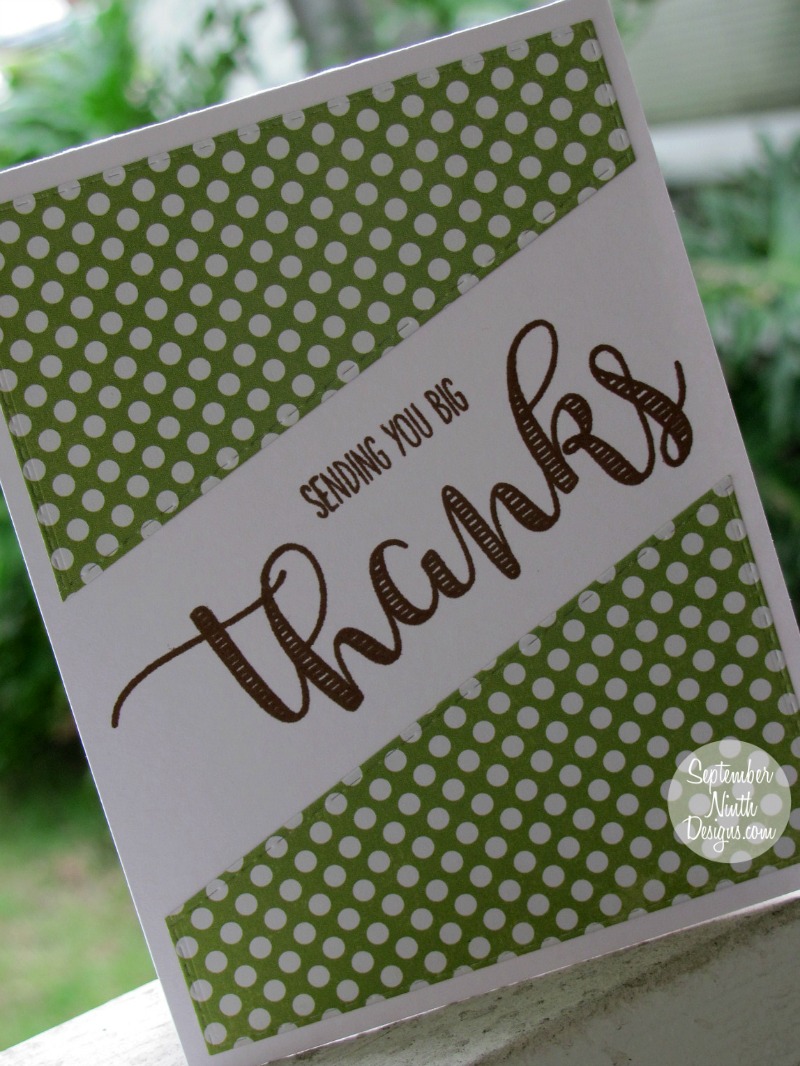
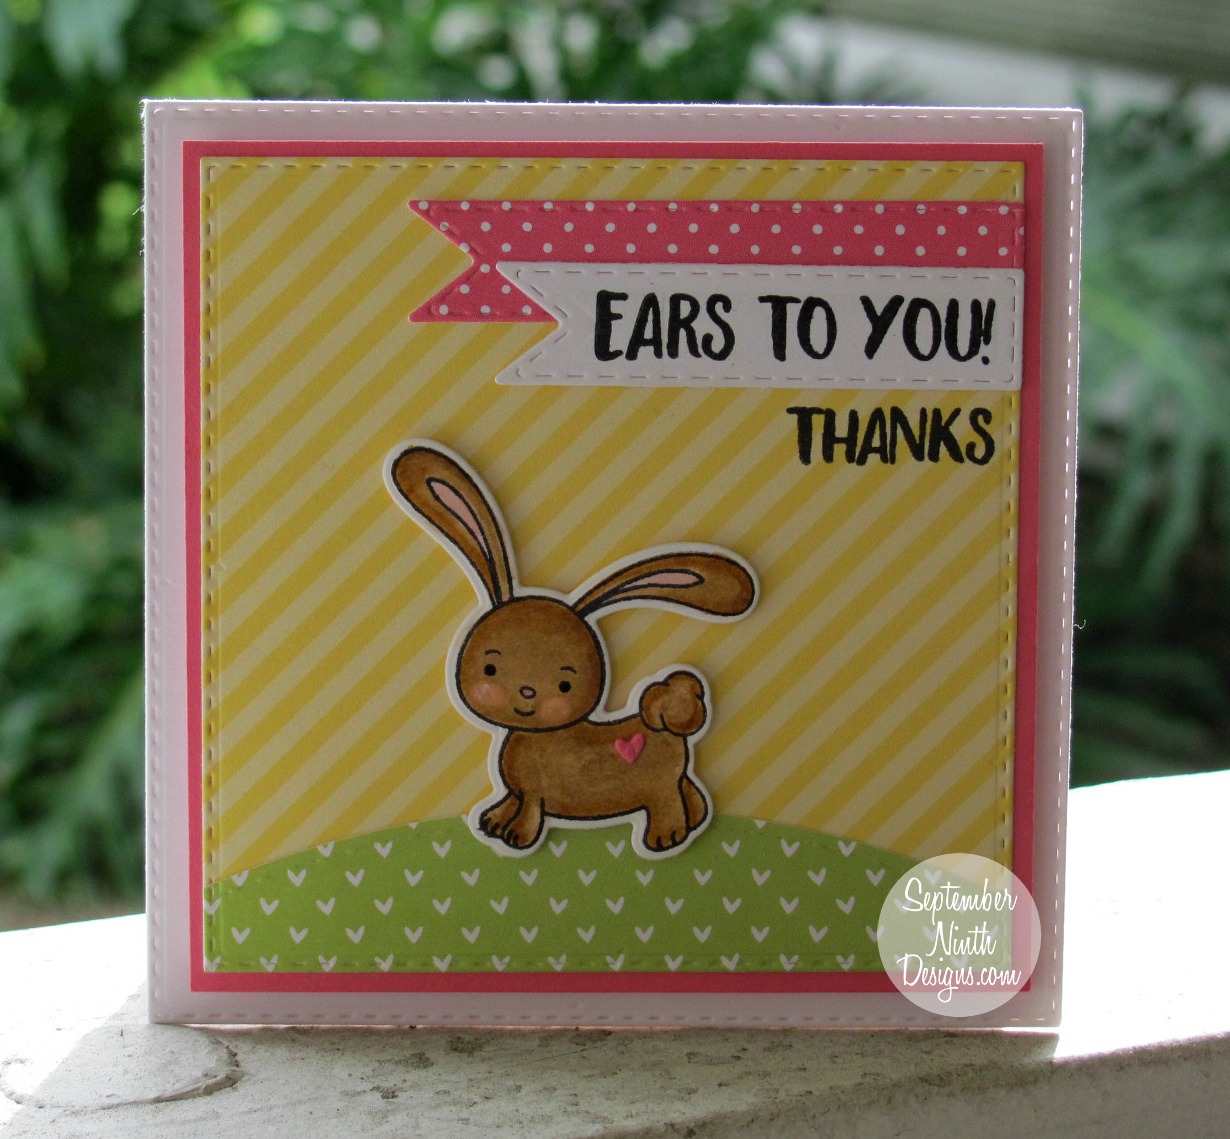
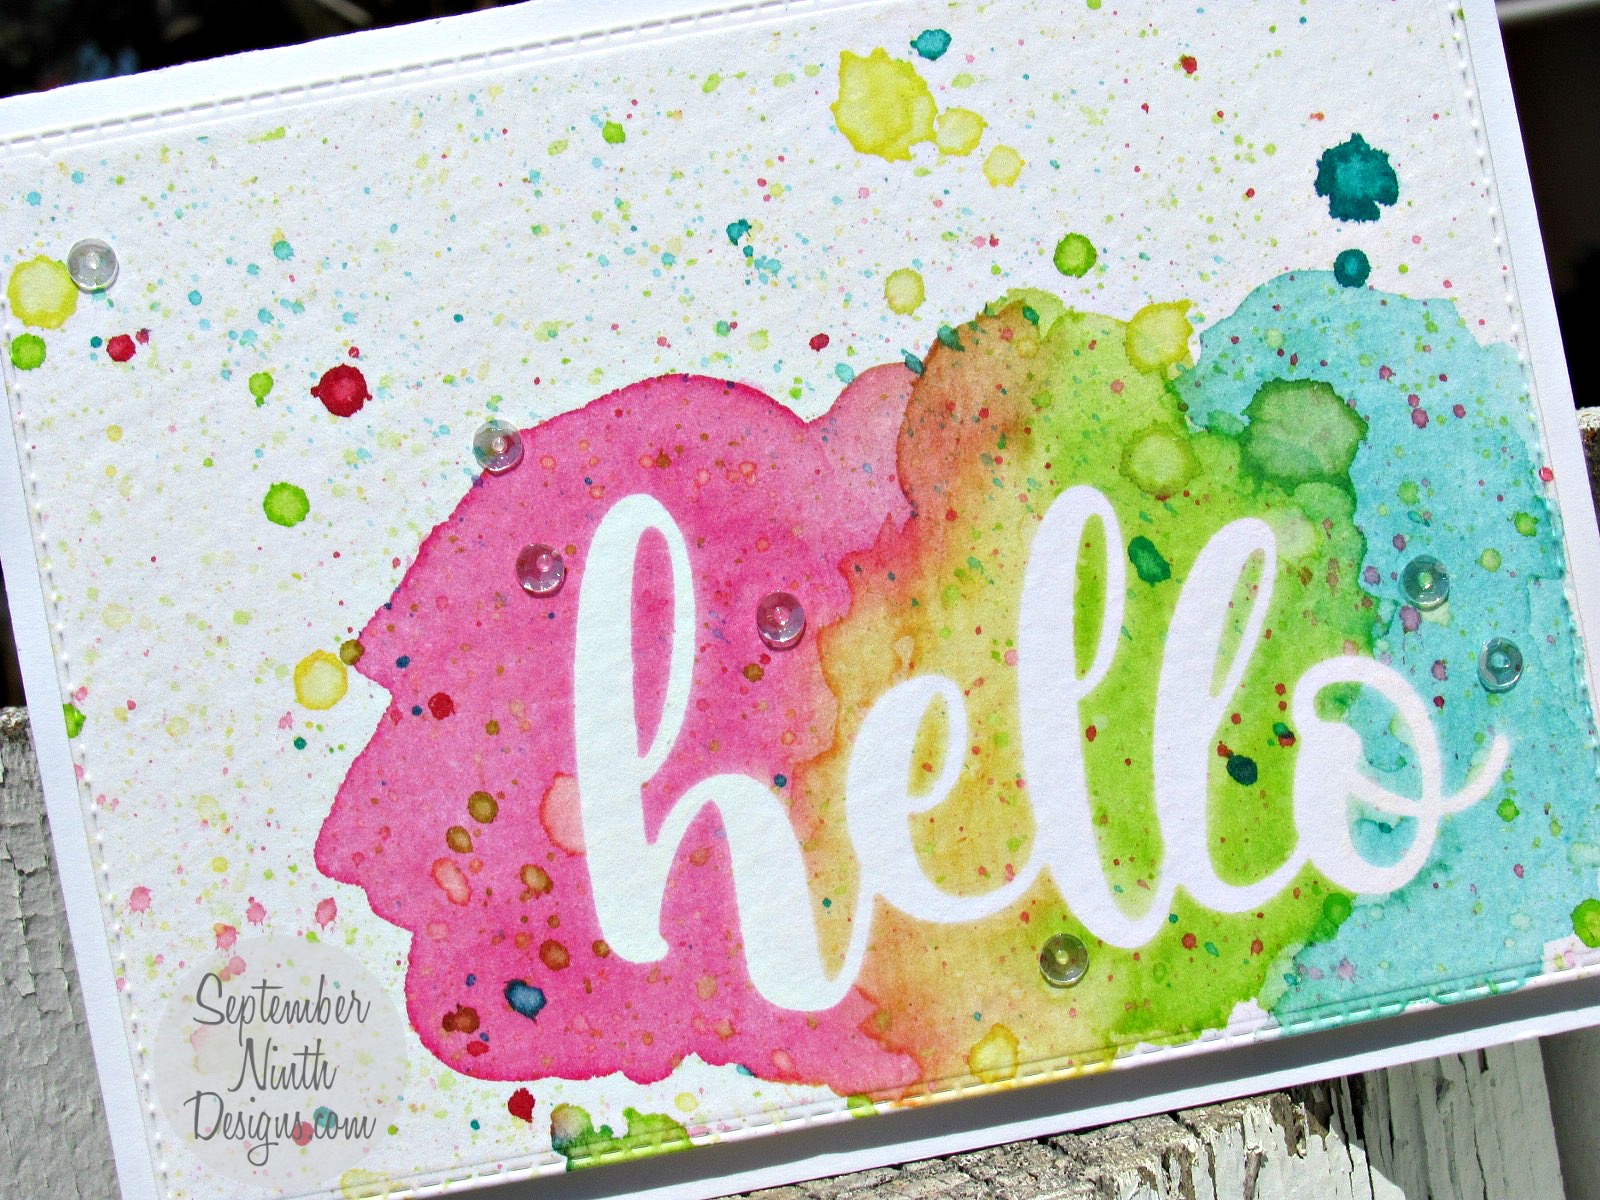
Today is Tutorial Thursday over on the My Creative Time blog. I made two watercolor cards with a cool watercolor masking technique.
IMG_1626-1
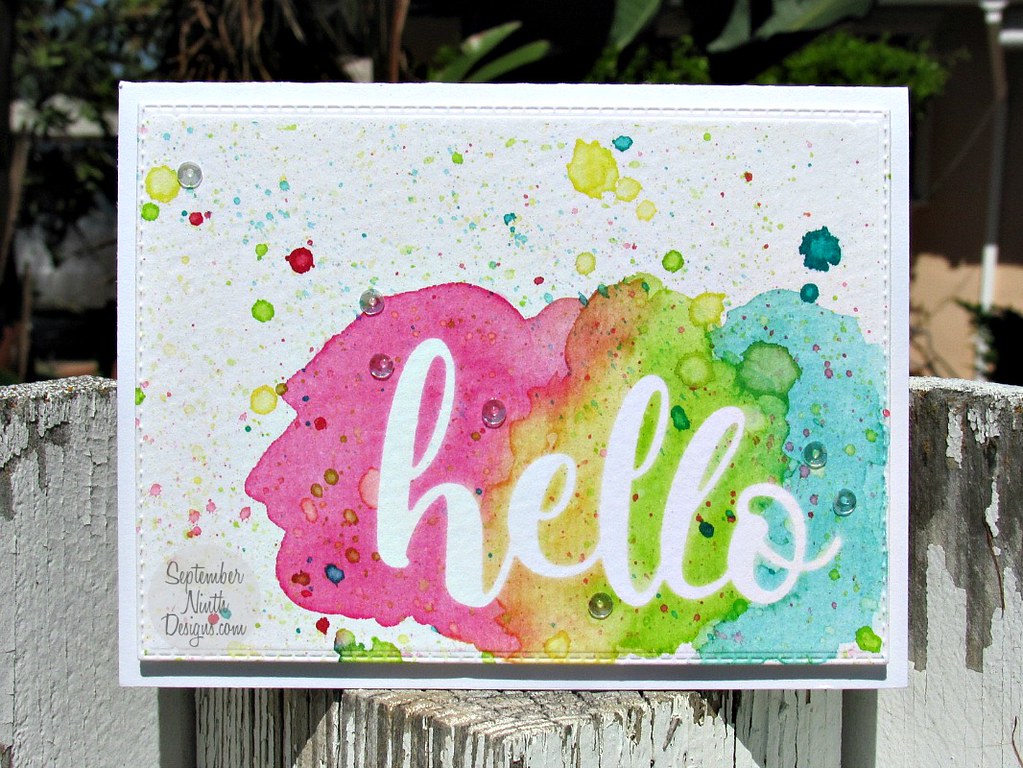
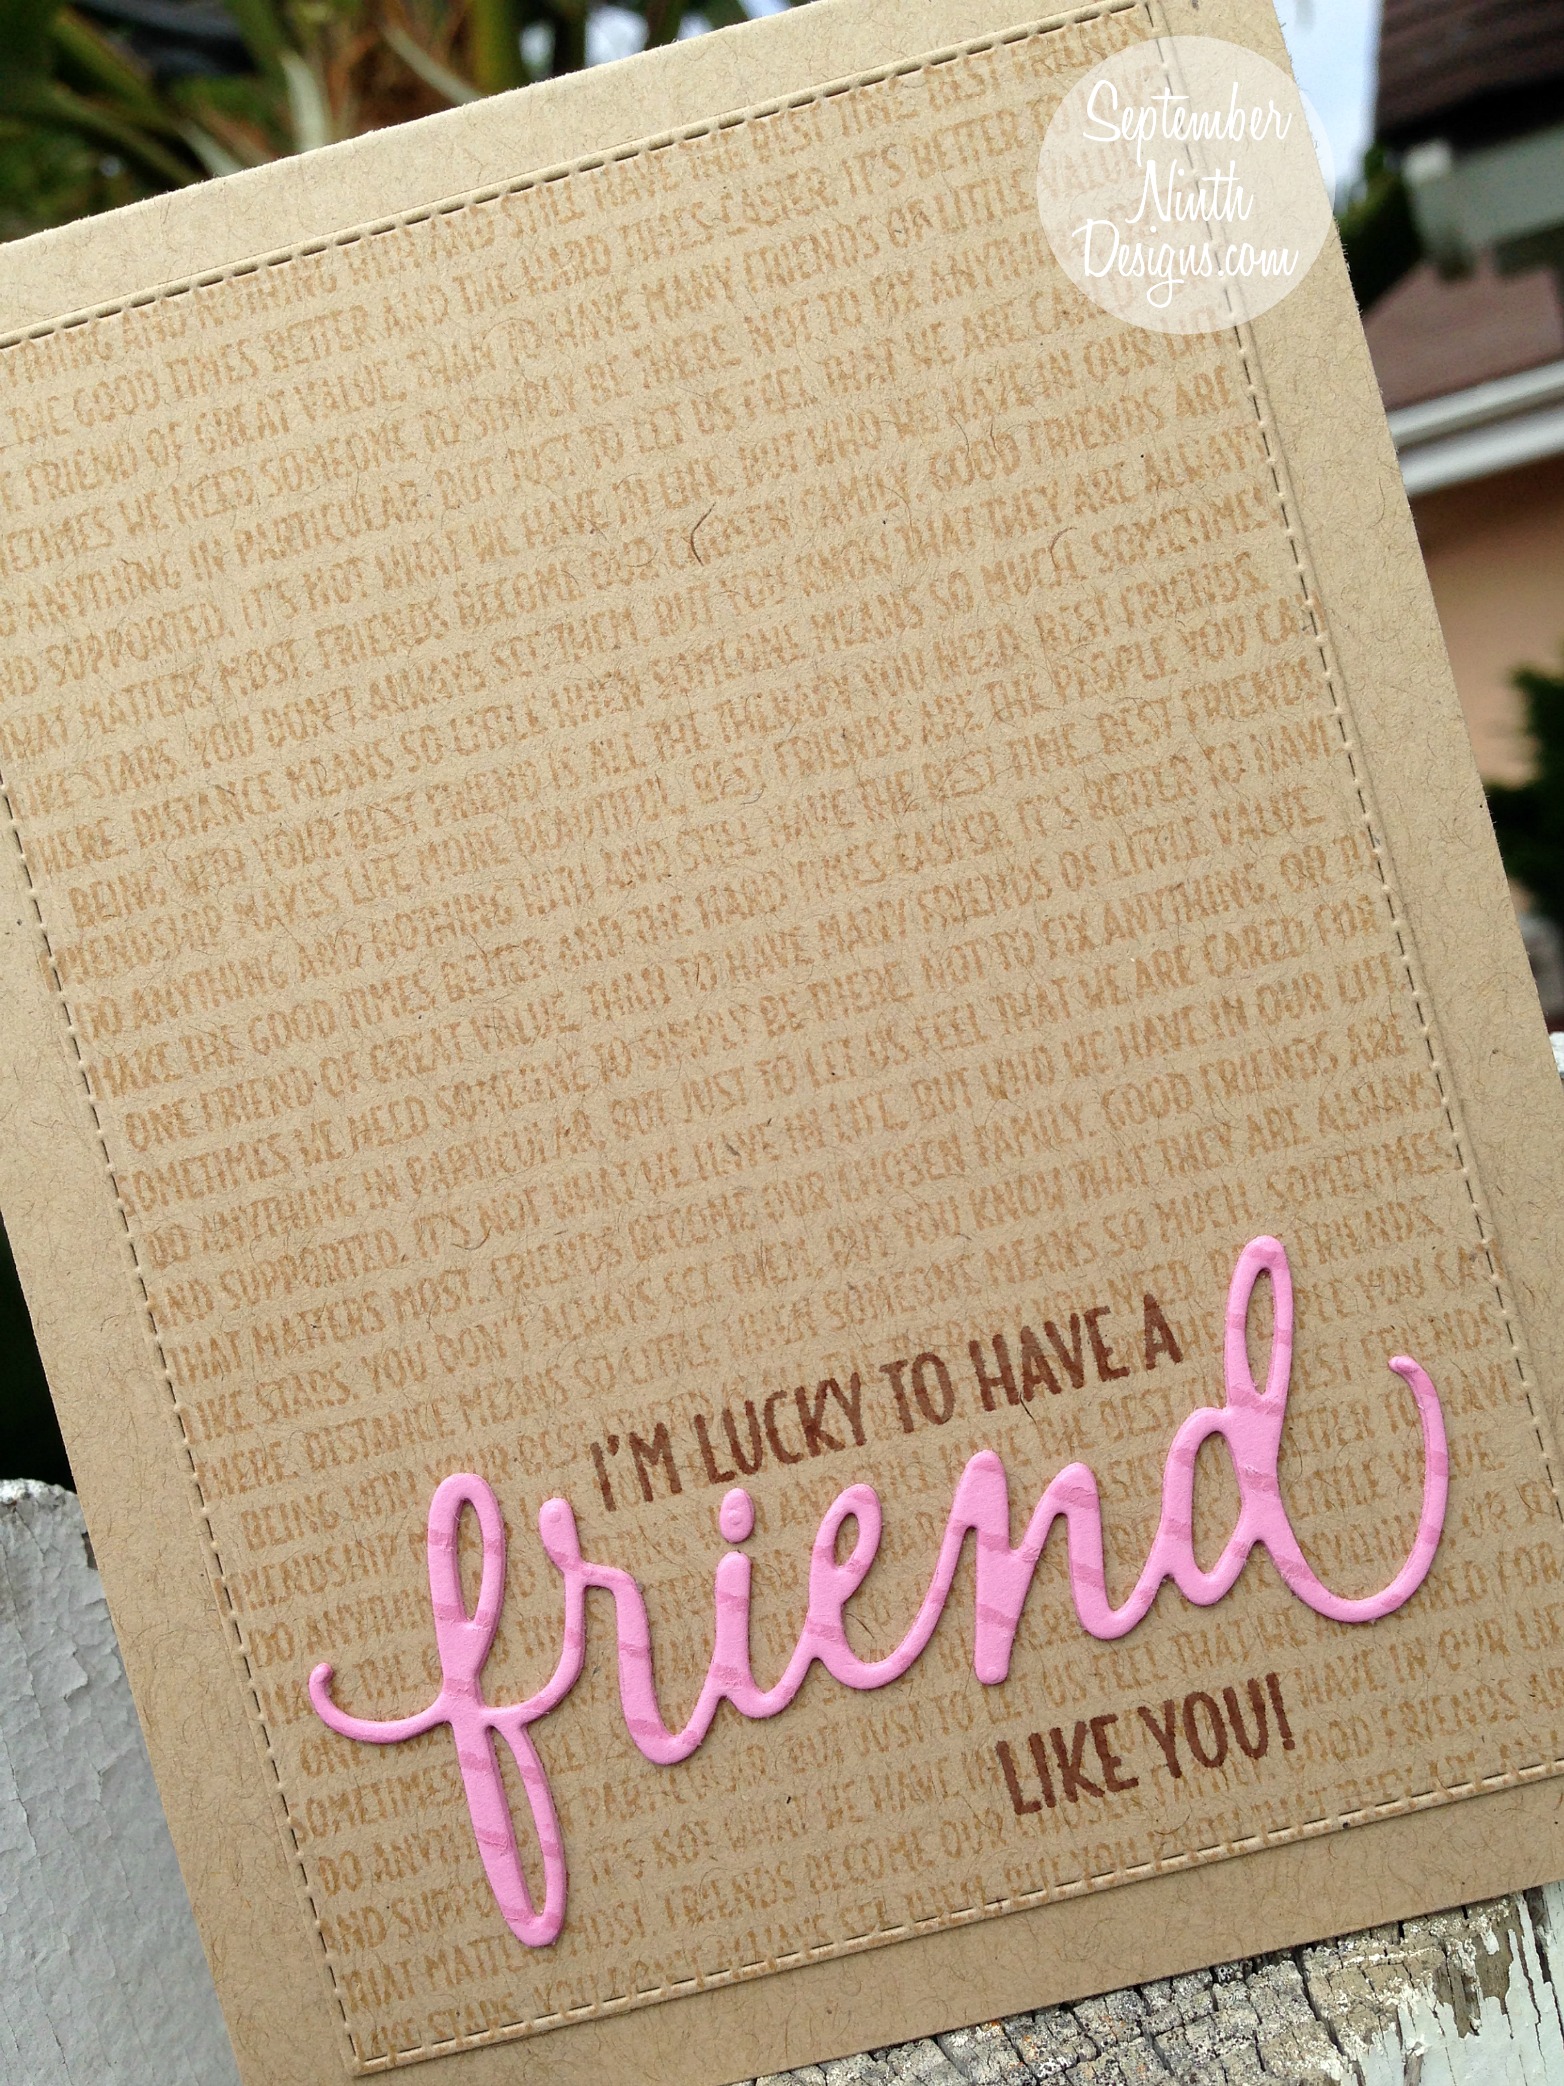
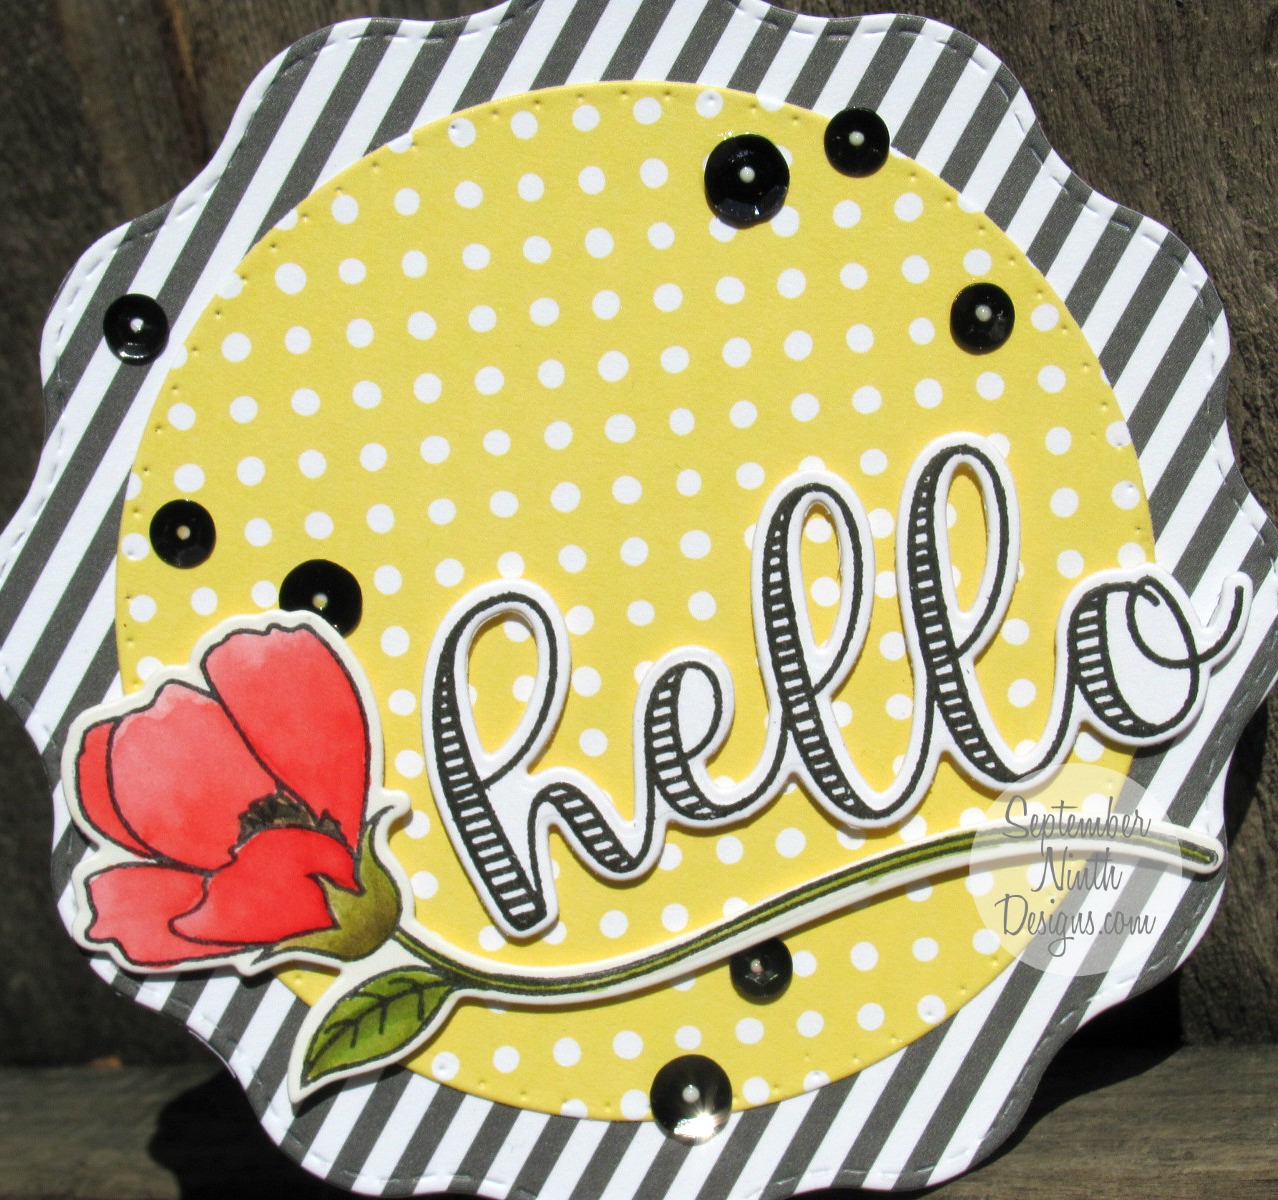
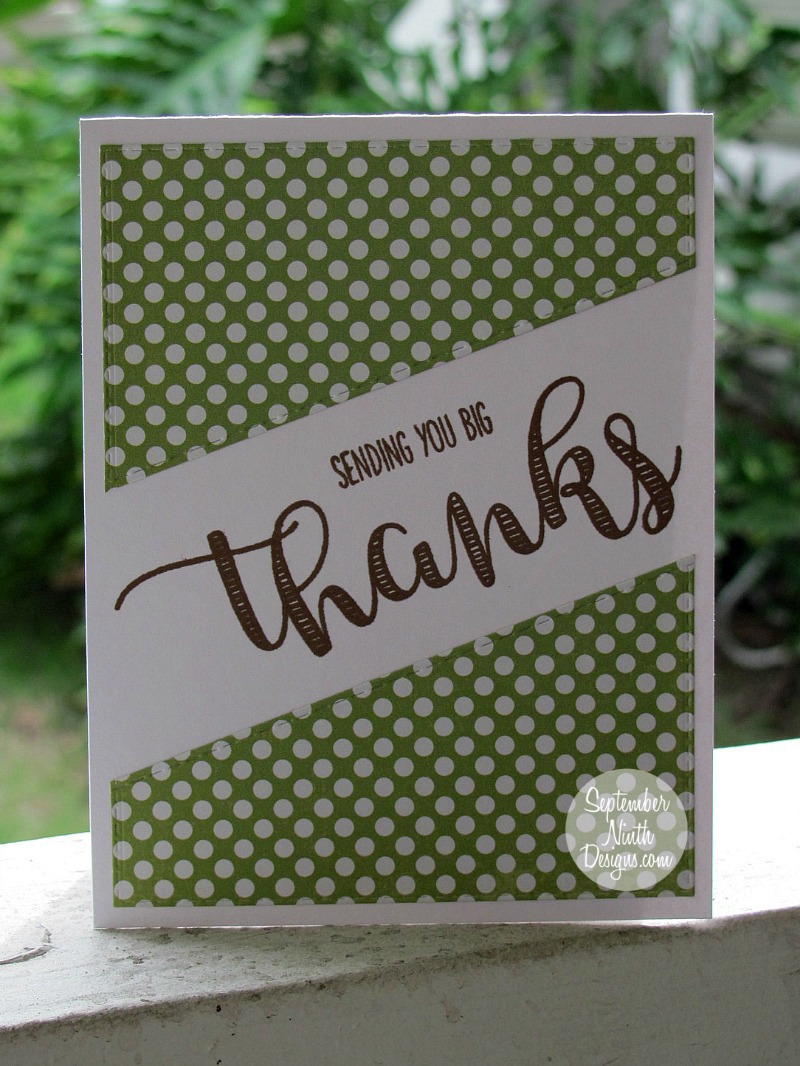
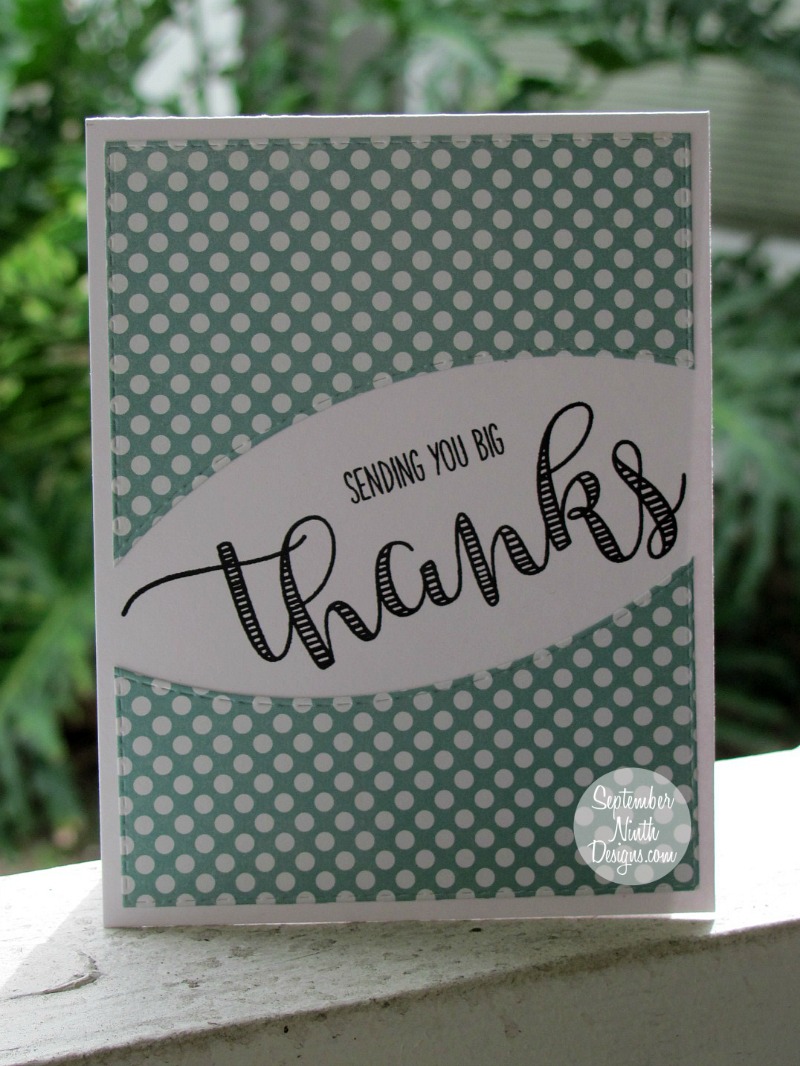
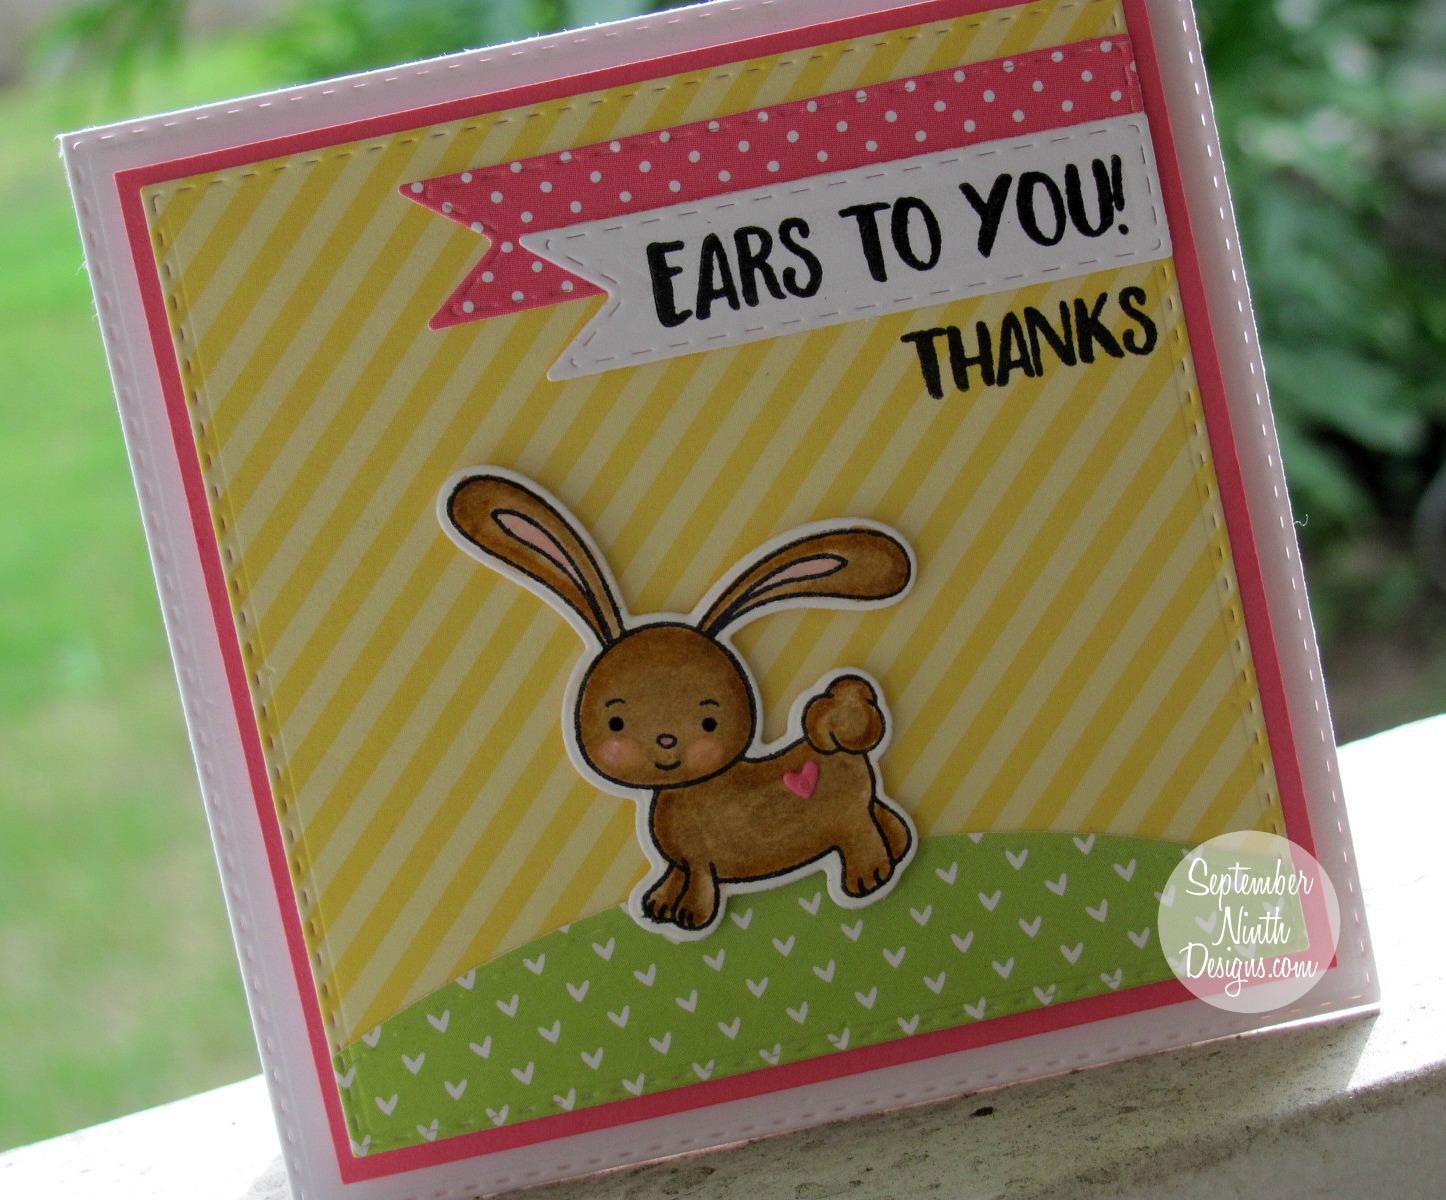
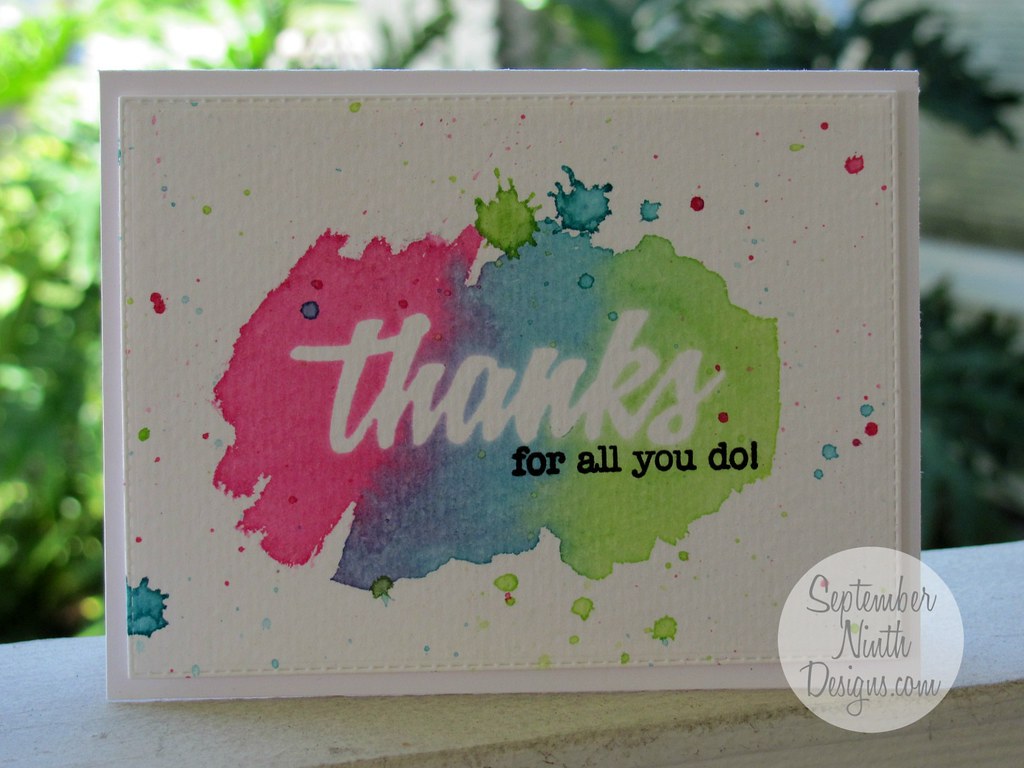
 The above card was made with the new Big Hello Die. The card below/in my tutorial, was made with an older stamp and die set called, Happy Thoughts Stamp Set.
IMG_1663-1
First you need some freezer paper. You can find freezer paper in most grocery stores, it's in the same area as the aluminum foil and plastic wrap. Please Note: wax paper and parchment paper will not work for this technique, it must be freezer paper.
IMG_1648-1
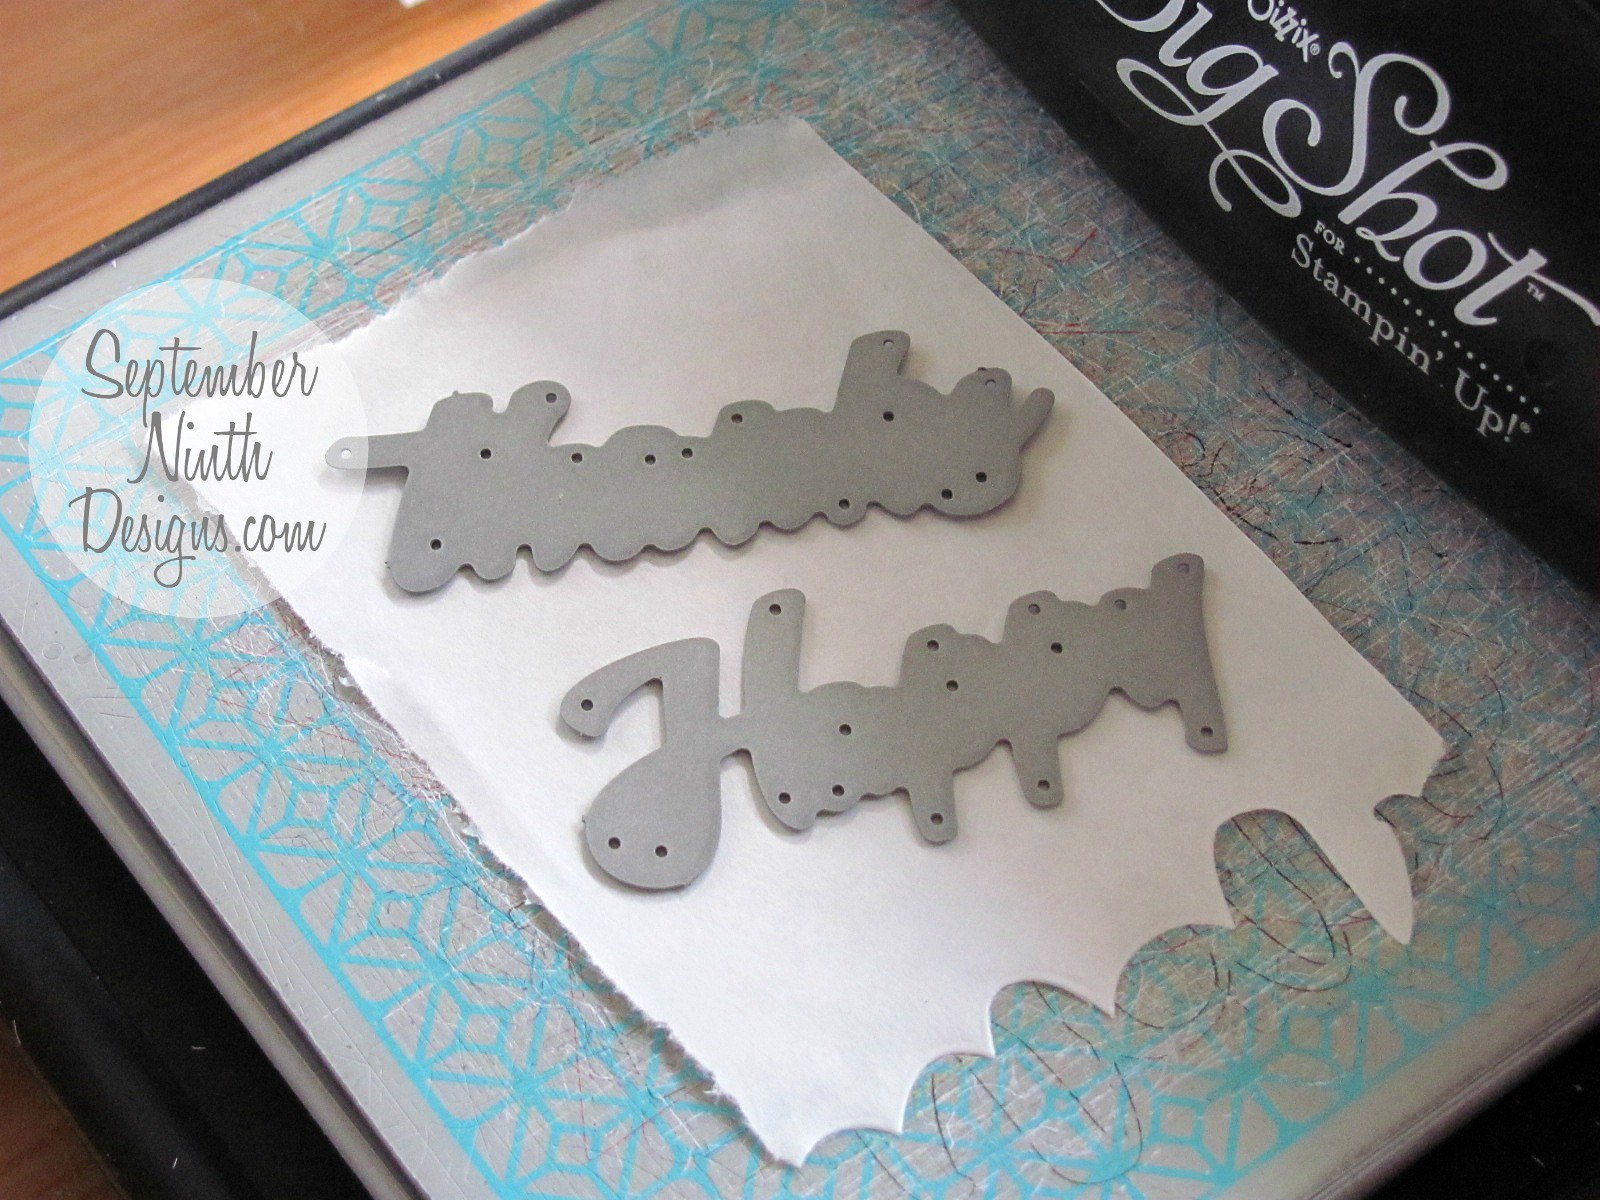
Grab whatever dies you have that will work as a mask. Place the paper side up/wax side down, on you cutting mat, place your dies on top, and run them through your machine. Please note... this technique will not work with wax paper or parchment paper.
IMG_1646-1
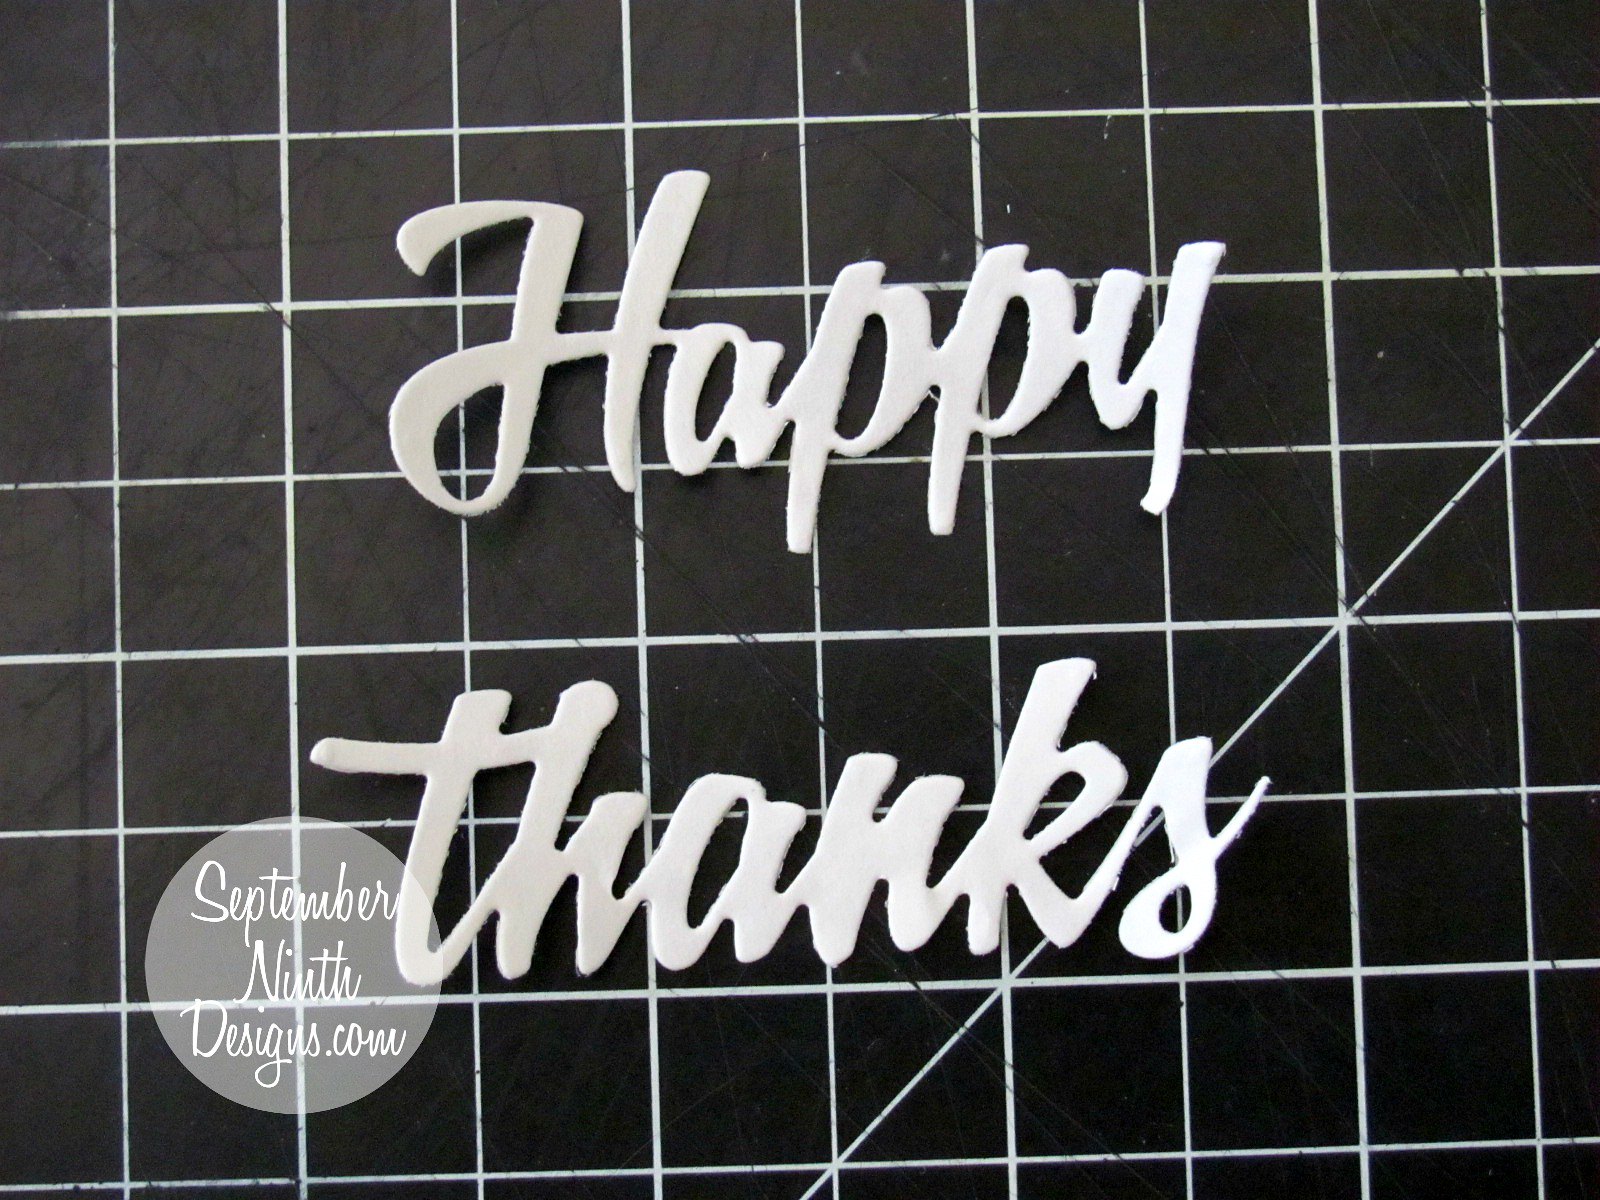
This is what they look like once they're cut out.
IMG_1647-1
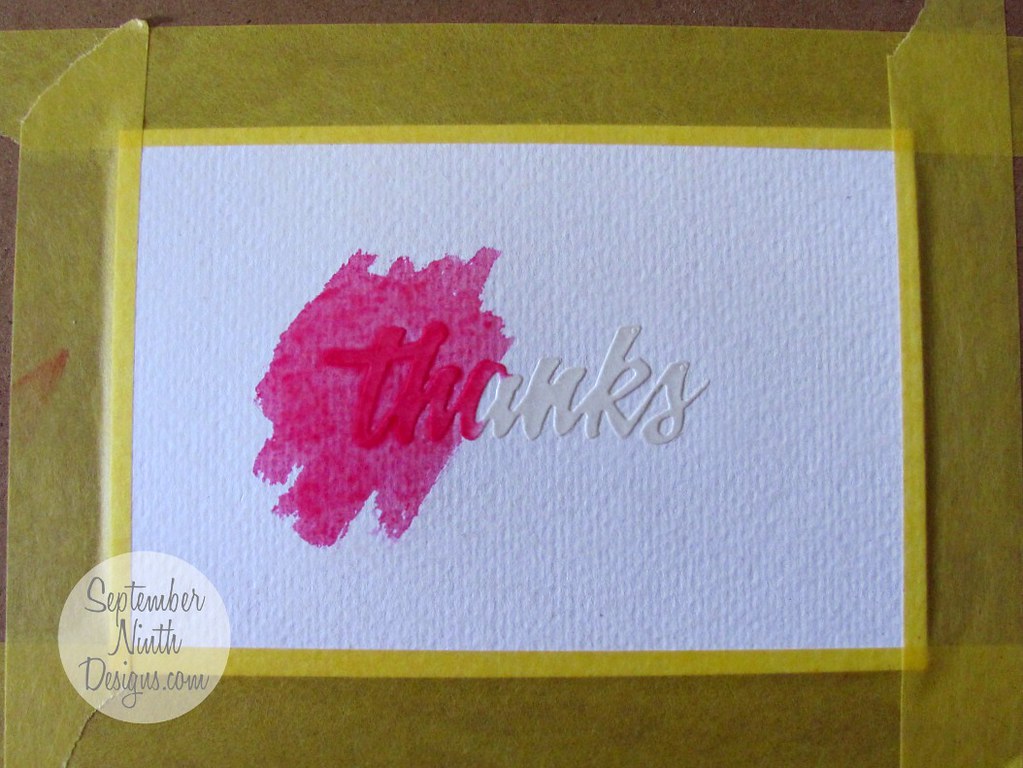
Once your masks are cut out, then you need to iron them to the watercolor paper. I set my iron on medium/high (5/6 on my dial) and then pressed for 15 sec intervals. You don't want to burn your paper, but you need to make sure the wax on the back of the freezer paper melts, so that it seals the mask to the watercolor paper.
IMG_1649-1
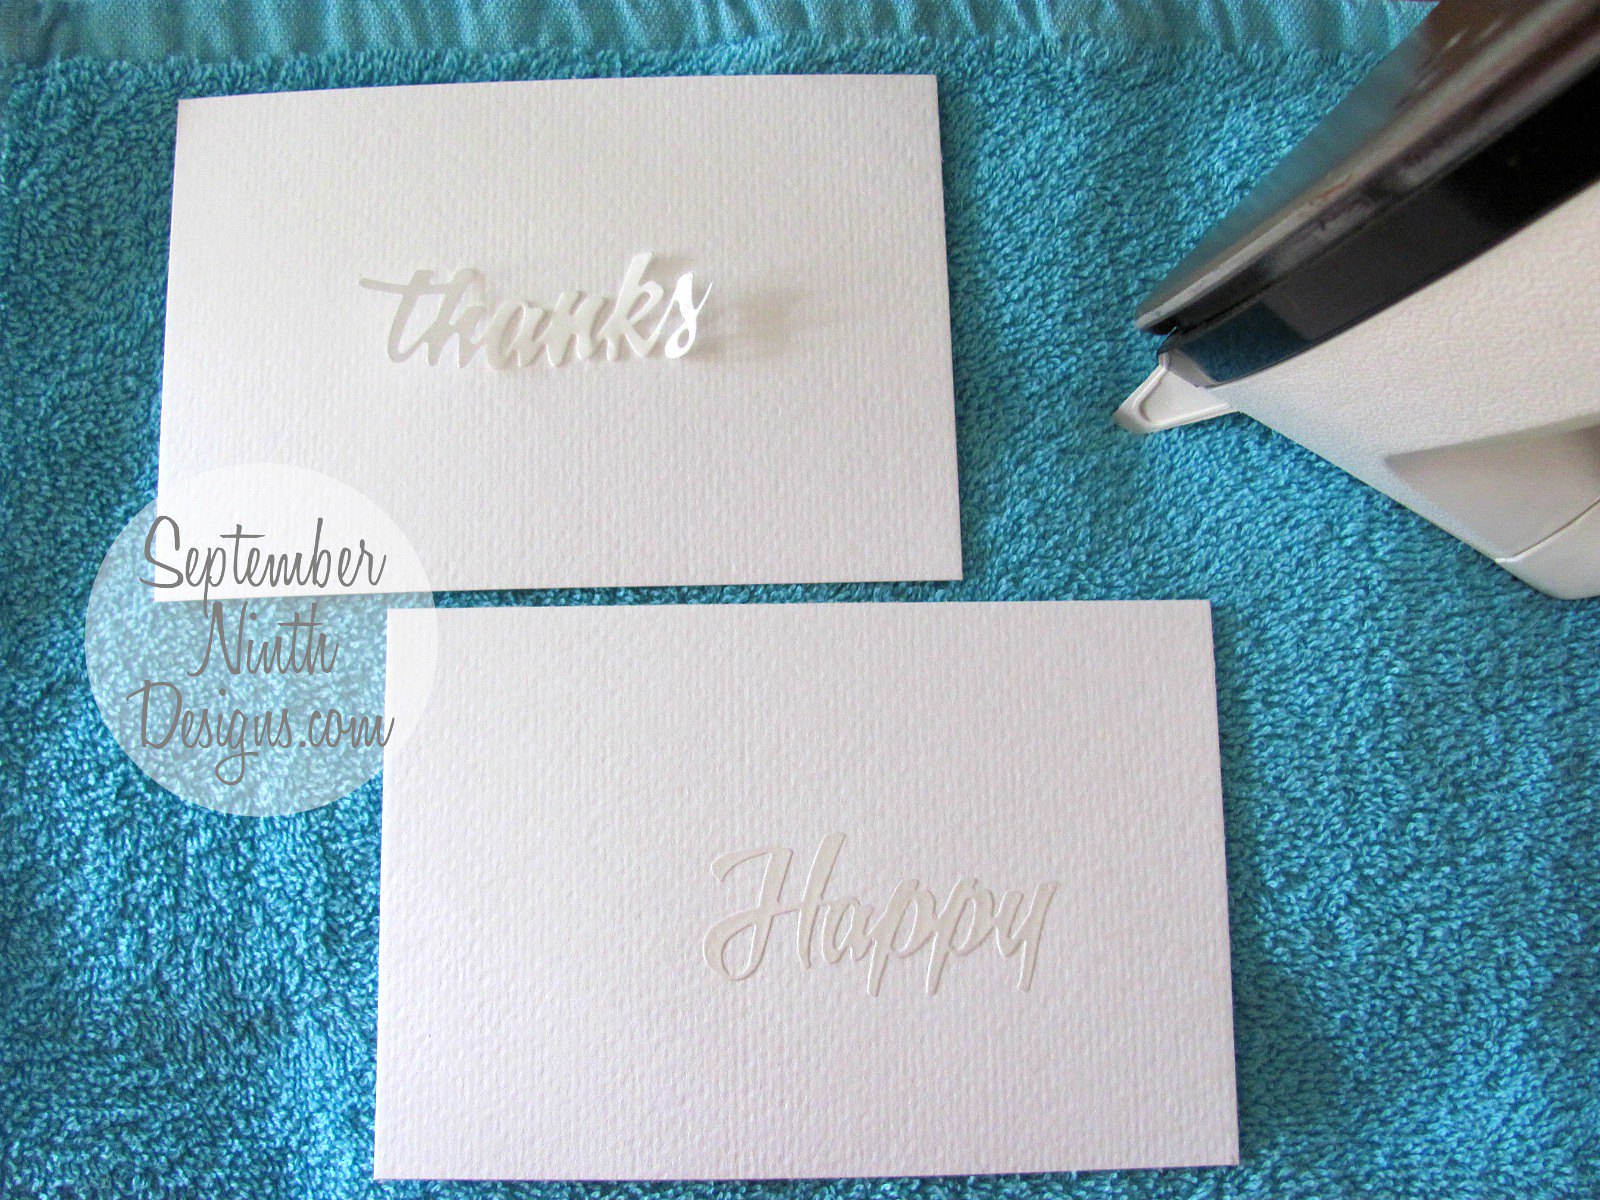
In the above picture you can see what the mask looks like after it's been ironed on (bottom piece).
IMG_1656-1
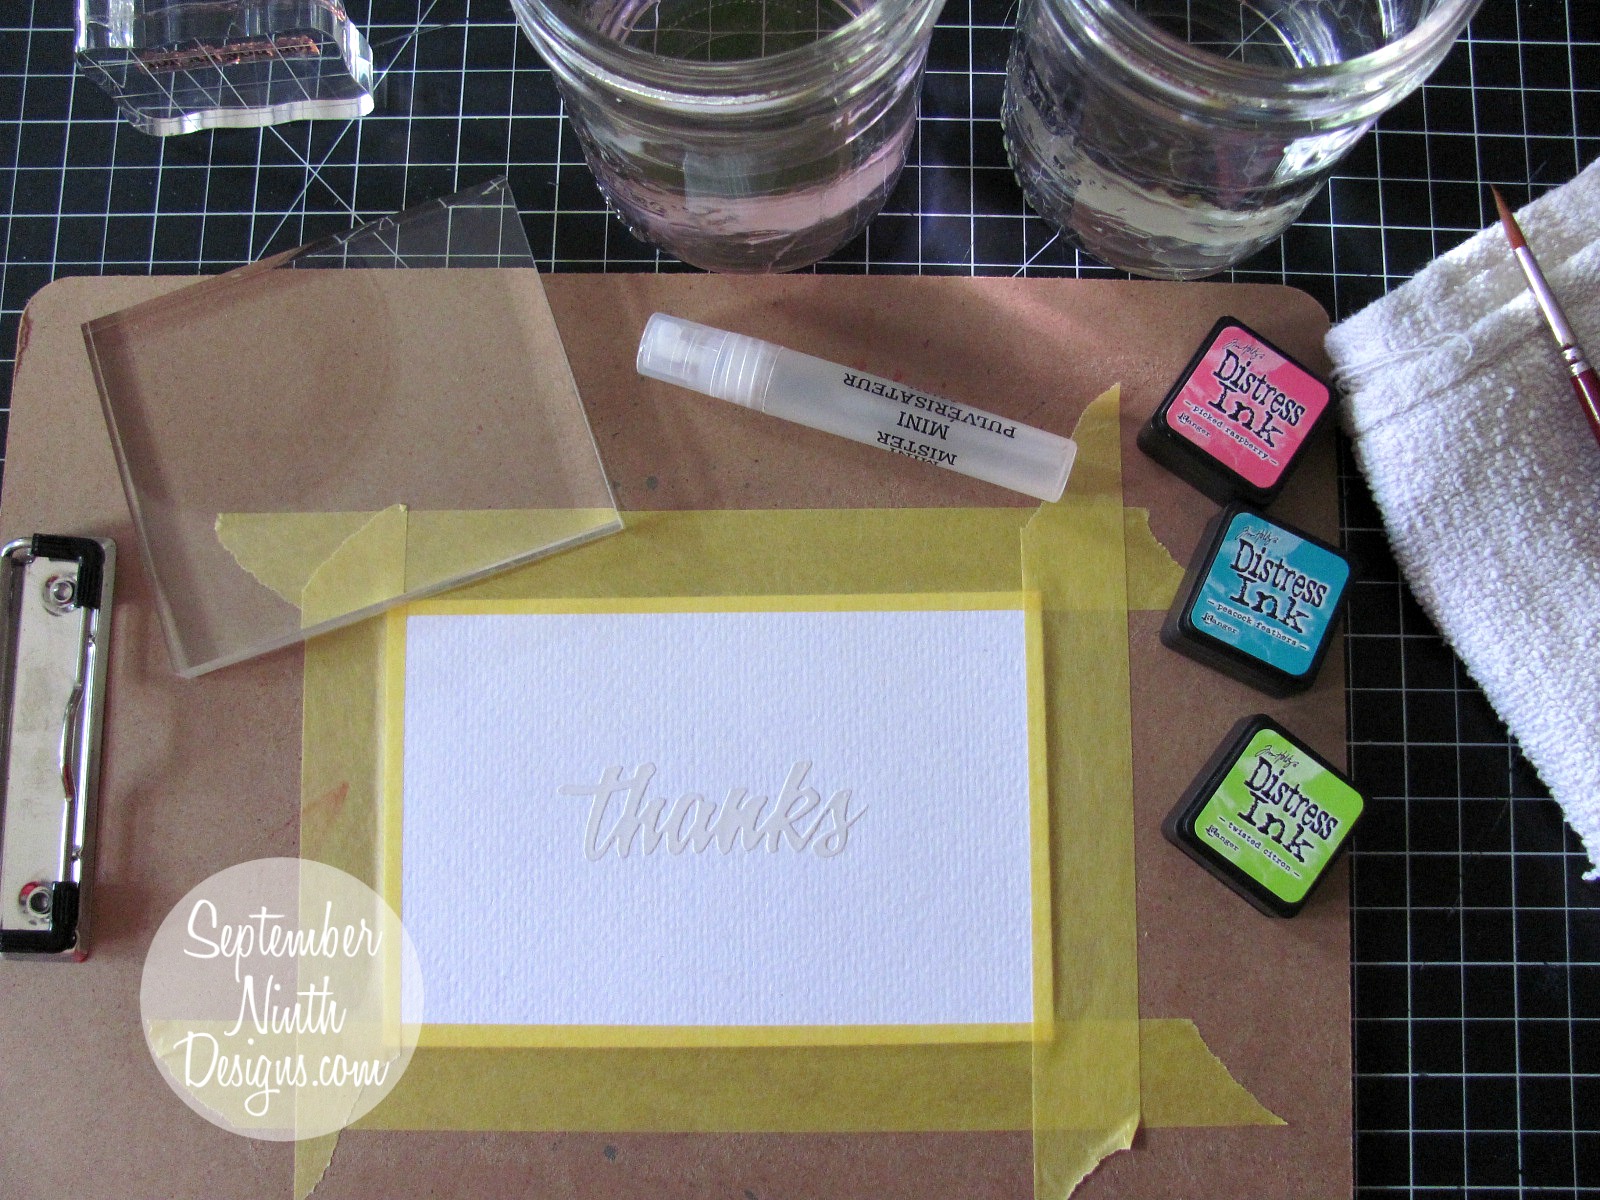
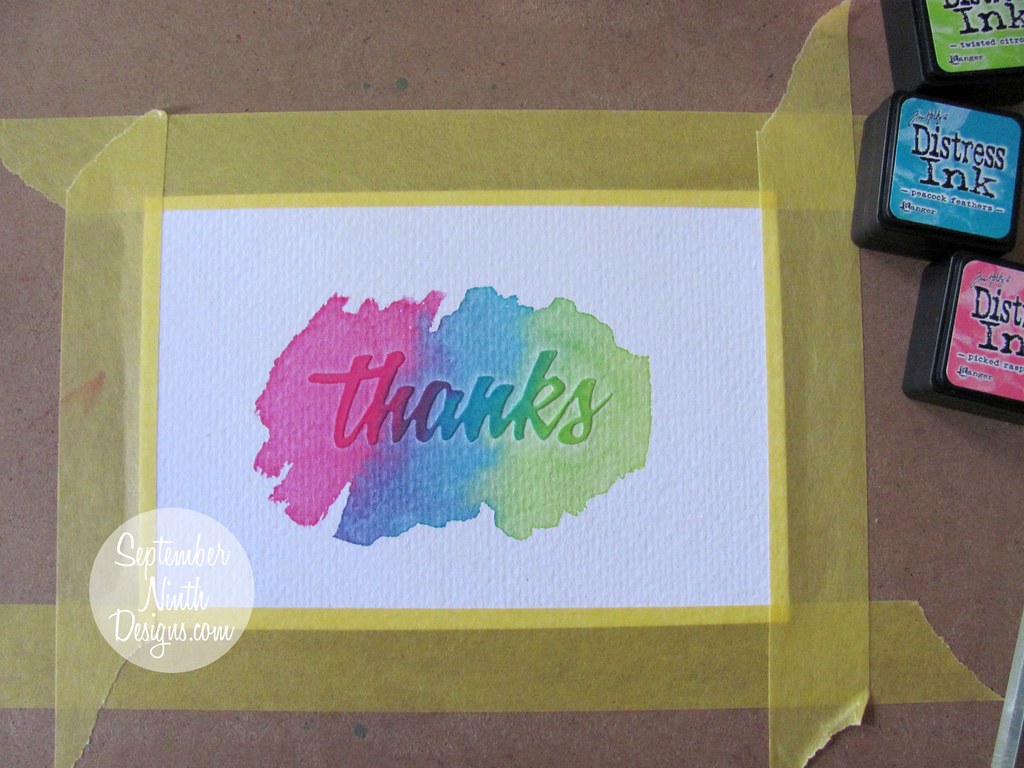
Once your mask is ironed on, then you can start your water coloring process.
IMG_1657-1
I started with picked raspberry distress ink. If you mask pulls up once the watercolor hits it, then your iron either wasn't hot enough, or you didn't leave the heat on long enough.
IMG_1659-1
Once I finish my watercolor, I use my heat tool to dry my design/paper. Once the watercolor/paper is all dry then you can use the heat tool to heat the mask as bit. This will warm the wax and the mask will be easily removed. I use my tweezers to gently remove it. There will be no residue left behind.
IMG_1661-1
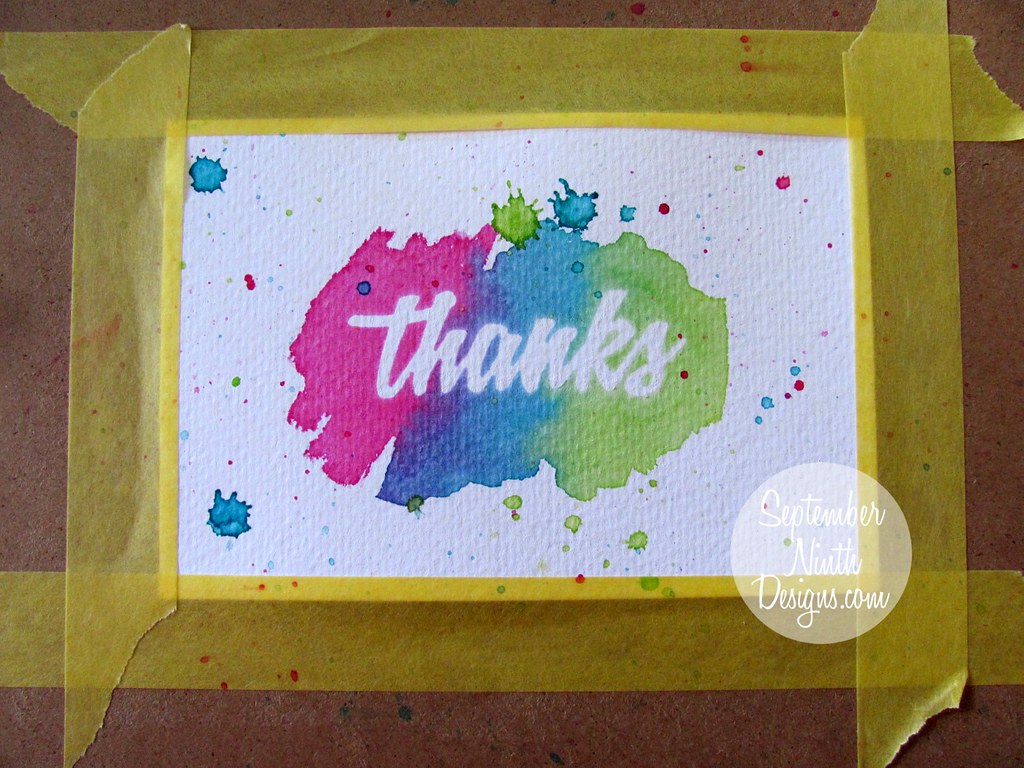
This is what it looks like once the mask is removed. Then you can attach your design to the base of your card. I used the largest of the Stitched Rectangular Frame Dies & More, to cut my design out.

A few more things...
You can also do this same technique, but use your cutting machine. So if you don't have any dies, you can use .svg designs and your electronic machine. Just make sure that you use a lightly sticky (well worn/used) mat, place the paper side of the freezer paper down. The wax will stick to the glue on the mat and ruin your mat, so make sure the paper side is down. Also... remember to "mirror" the design, you are cutting out, since the paper is face side down your design will be backwards if you don't "mirror". I set my blade on 1/2 and pressure at 3/4, but you will probably need to test it on your machine. It will really depend on how worn your blade is. Gently remove you design once it is cut out and follow the instructions above. I use this technique a lot when I am making custom items for gifts or clients. I normally use it for fabric or wood though, I've never used it for paper crafting before. I've made fabric banners, flags, pillows, bags, t-shirts, other clothing, wood signs.... ect. using the same technique but with fabric/regular paint.

IMG_1628-1IMG_1664-1

Products

Paper: Papertrey Ink (White), Watercolor Paper
Watercolor: Tim Holtz Mini Distress Ink (Twisted Citron, Picked Raspberry, Squeezed Lemonade, Peacock Feathers)
Sequins: Pretty Pink Posh
Freezer Paper: Reynolds (Target)
My Creative Time Products:

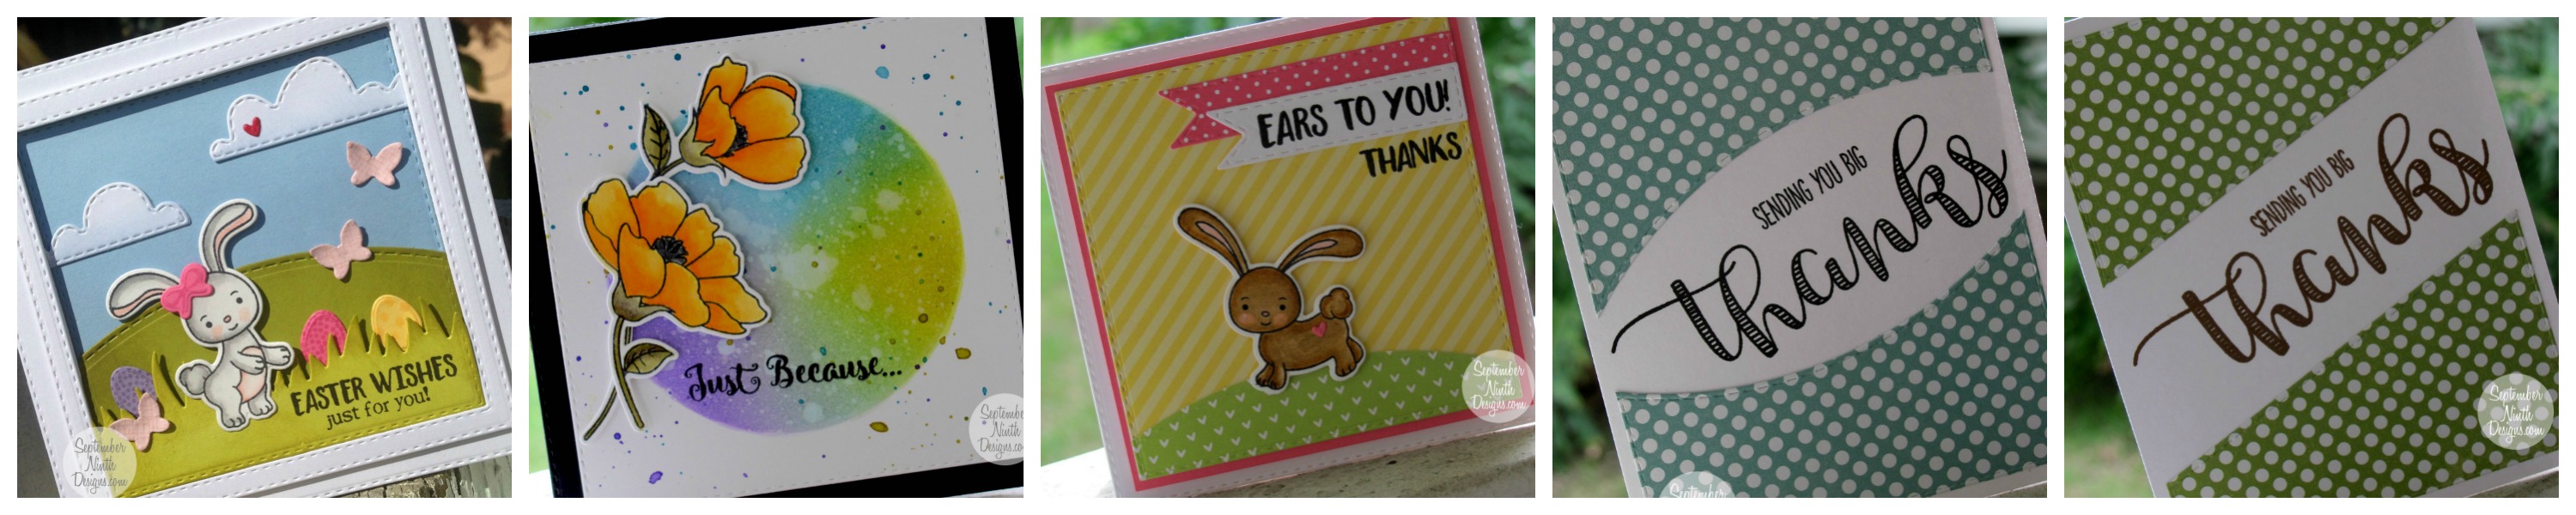
To see more Tutorial Thurs projects, click here.

I hope you have a wonderful day!

March 25, 2016

March Flash Sale

Happy Friday!!!
Good morning & welcome to another "48 Hour Flash Sale!" This sale will run from now until Sunday, March 27, 2016 @ 7am PST.  Today, we are all featuring a brand new "HELLO" die! 
51
My first card was made with the largest of the Stitched Rectangular Frame Dies & More. I used Peerless watercolors to make the background. The small banner was cut from the smallest Ribbon End Banner Dies and the sentiment came from the Fun Notes set.
56
My second card was made with the largest of the Stitched Postage Frame Dies
I used Peerless watercolor on this card as well, I also used freezer paper to mask off the word die/hello. I will have a tutorial showing how to do this technique here on my blog this coming Thursday (3/31). It's a really fun and easy technique, so make sure to check back in on Thursday.

5055

Products

Paper: Papertrey Ink (White & Black), Watercolor Paper
Watercolor: Peerless ( Butterfly Wing Blue & Alizarine Red) & (Blush Rose, Cobalt Blue, Amethyst)
Ink: Versmark (Clear)
Embossing Powder: Ranger (Superfine White)
Freezer Paper: Reynolds (Target)
Sequins: Pretty Pink Posh

Don't forget to use the code FLASH at checkout to get 20% off of your entire "in-stock" only purchase! 

Blog Hop Giveaway!

Leave your comments on every stop for a chance to win a $25.00 gift card to the "My Creative Time" store! Don't forget to leave a way for us to contact you "just in case" YOU are the LUCKY winner!  
Good Luck! 

 Don't forget to use the code FLASH at checkout to get 20% off of your entire "in-stock" only purchase! Click here to go to the store.

Thanks for hopping along with us!
 I hope you have a wonderful day!

March 23, 2016

What a Treat


IMG_1606-1
Happy Wednesday!!!
Today is What a Treat day over on the My Creative Time blog. I made a Easter bag/treat with the bag die in the Chalkboard Birthday Stamp & Die SetThe chick, cracked egg, and pattern stamps are from the To A Cute Little Chickie Stamp Set and the egg dies are from the new Ears To You set. I embossed a sentiment from the Hello Chickie! Stamp Set.IMG_1608-1

Products

Paper: Papertrey Ink (Kraft, Lovely Lady, Aqua Mist, Hibiscus Burst, Bright Buttercup), Echo Park (Bundle of Joy A New Edition Boy & Girl stacks)
Ink: Papertrey Ink (Kraft, Lovely Lady, Aqua Mist, Hibiscus Burst, Bright Buttercup), Versafine (Onyx Black)
Peachy Keen Stamps: PK-1373 Chikie Face Assortment
Glaze Pens: Bright Colors
Ribbon: Papertrey Ink (5/8" Stitched Hibiscus Burst)
Twine: Timeless Twine
Click here, to go to the My Creative Time blog and see more treats. 

I hope you have a wonderful day!
 

March 17, 2016

Thoughtful Thursday

Happy Thursday!!
Today is Thoughtful Thursday over on the My Creative Time blog. I've had the idea/design for this card floating around in my head for awhile now. I'm glad I finally had the chance to make it.
25702772781_59d48c2b1d_o
I stamped the Best Friends Background Stamp in kraft ink on kraft card stock. Then I took a piece of PTI's lovely lady and stamped it with the Stripey Background II Stamp in lovely lady ink. I took it and cut out the "friend" die from the Friendships Are Forever Stamp & Die SetThe rest of the sentiment is from the same set. I used a darker brown ink, so it would stand out from the background.
25771791796_74b8fab1e8_o

Products

Paper: Papertrey Ink (Kraft, Lovely Lady)
Ink: Papertrey Ink (Kraft, Lovely Lady), Lawn Fawn (Walnut)
Misti: My Sweet Petunia
My Creative Time Products:
 Metal Adaptor Plate
Snips (wire cutters)
MORE Stitched Rectangular Dies
Friendships Are Forever Stamp & Die Set
Best Friends Background Stamp
Stripey Background II Stamp

St. Patty's Day Giveaway!!!

Emma figured since it's St. Patrick's Day….why not do a giveaway?? She will give ONE "lucky" winner these 2 stamp sets~! If you happen to have them already, why not try to win it for a friend???  All you have to do is leave a comment here on my blog  AND on the other 3 blogs for a chance to win! ***IMPORTANT, DON'T FORGET TO LEAVE A WAY FOR US TO CONTACT YOU if you are the lucky winner! Emma will announce the winner on Monday! 
GOOD LUCK my sweet friends! 


I hope you have a wonderful day!


March 14, 2016

Scrapping the Little Things

4-4
Happy Monday!!!
Today is Scrapping the Little Things day over on the My Creative Time Blog. I made a quick layout for my mini album with a picture of my two favorite boys.
2-2
I used the 4x4 square die from the Stitched Square Dies Inside & Out
set for the base squares. The yellow journaling piece was made with the same die, but with a partial cut because it's smaller. I used one of the journaling stamps from the Journal It! Stamp Set. The arrow was cut from the Stitched "Capture" Frame with Arrow Dies
and stamped with a background stamp from the Build a Banner Kit.
3-3

Products

Paper: Papertrey Ink (Pure Poppy, Bright Buttercup), My Minds Eye (Boy Crazy)
Ink: Papertrey Ink (Pure Poppy, Bright Buttercup)
Misti: My Sweet Petunia

If you would like to see more Scrapping the Little Things projects, click here

I hope you have a wonderful day!


March 11, 2016

My Creative Time 53rd Edition Release Blog Hop

Happy Friday!!!
Today is My Creative Time's release day. What a fun week it's been, full of new products and lots of fun inspiration! I've had so much fun viewing the sneaks each day. If you've arrived from super fabulous Nikki's Blog, then you are on the right track, if you would like to start at the beginning, click here. 
25-25
Today's card was made with the new Fun Notes and Just Because sets. I water colored the flower with TH distress inks and the card base was made with the Bunch of Fun Circle Dies. Quick and easy peasy!
26-26

Supplies

Paper: Papertrey Ink (White), Lawn Fawn (Let's Polka In The Meadow), Strathmore (Bristol Smooth Watercolor Paper 100lb)
Ink: Tim Holtz Distress ink (Candied Apple, Forest Moss, & Black Soot), Versafine (Onyx Black)
Black Sequins: Pretty Pink Posh  (6mm & 5mm)
My Creative Time:

March Freebie

This ADORABLE "Mini Butterflies" die, will be given to the FIRST 150 shoppers! If you are one of the 1st 150 shoppers it will be automatically added to your package at the time of packaging/shipping. Once 150 shoppers come through, this stamp & die set will be available for purchase. So, if it’s for sale in the store, you are not one of the 150. No exceptions will be made. This freebie set is not a part of the “bundle” and will be sold separately!

Blog Hop Giveaway

The blog hop giveaway is a $50 gift card to the "My Creative Time" store! All you have to do is leave a comment on each of our blogs! You are NOT required to comment on EVERY SINGLE blog, but the more blogs you comment on, the MORE chances you have for winning! (One comment per person please! Additional comments will be removed to make it fair for everyone.) VERY IMPORTANT, PLEASE leave a way for us to contact you w/your comment just in case "YOU" are the lucky winner!  

Sale

ALSO, DON'T FORGET, our sale starts RIGHT NOW here! Use the code: MAR2016 to receive a discount off your entire purchase! This sale applies to "IN-STOCK" items ONLY. This sale will end on Friday, March 18th @midnight PST.

101
I hope you have a wonderful weekend!

March 10, 2016

My Creative Time March Release - Day 4

Happy Thursday!!!
Today is the third day of sneaks for this months My Creative Time March releases. Today we are featuring a new stamp and die set called "Fun Notes".
6-6
I'm really excited about his new set! It has 6 large words and coordinating dies. There are also a few small coordinating sentiments. It's perfect for making really fast and simple cards.
8-8
I used the More Stitched Edges (released last month), along with the "Thanks" stamp from  today's set to make these two quick cards.
7-7 5-5

Products

Paper: Papertrey Ink (White), Echo Park (Bundle of Joy Dots & Stripes)
Ink: Versafine (Onyx Black), Lawn Fawn (Walnut)
My Creative Time Products
 Fun Notes (NEW)

Today's Giveaway

Today's sneak set will be given to one lucky winner! All you need to do, for a chance to win, is leave a comment on each blog. You are not required to leave a comment on each blog, but the more comments you leave, the better your chance. Please make sure that you leave your contact info, so Emma can contact you if you win. The winners will be announced on Emma's blog each day.

To see more sneak peaks, click here.

I hope you have a wonderful day!

March 09, 2016

My Creative Time March Release - Day 3

Happy Wednesday!!!
Today is the third day of sneaks for this months My Creative Time March releases. Today we are featuring a die set called "Ribbon End Banners".
2-2
I have a feeling these fun little banner dies are going to be my new favorite! I made a thank you card with the new Ears to You set (featured on Monday) and the largest of the smaller of the new Ribbon End Banner Dies. 
1-1

Products

Paper: Papertrey Ink (White, Hibiscus Burst), Lawn Fawn (Let's Polka In the Meadow), Strathmore (Bristol Smooth Watercolor Paper 100lb)
Ink: Hero Arts/Hero Hues (Black), Versafine (Onyx Black)
Watercolor: Zig Clean Color Brush Markers (028, 064, 072) 
My Creative Time Products
 Ears to You (NEW)
Ribbon End Banner Dies (NEW)

Today's Giveaway

Today's sneak set will be given to one lucky winner! All you need to do, for a chance to win, is leave a comment on each blog. You are not required to leave a comment on each blog, but the more comments you leave, the better your chance. Please make sure that you leave your contact info, so Emma can contact you if you win. The winners will be announced on Emma's blog each day.

To see more sneak peaks, click here.

I hope you have a wonderful day!

March 08, 2016

My Creative Time March Release - Day 2

Happy Tuesday!!!
Today is the second day of sneaks for this months My Creative Time March releases. Today we are featuring a new stamp and die set called "Just Because".
10-10-1
I used two of the flowers and one of the sentiments from the new set. I used Tim Holtz Distress inks to watercolor them. I also used the Bunch of Fun Circle Dies to create a mask for the background watercolor technique.
11-11

Products

Paper: Papertrey Ink (Black), Strathmore (Bristol Smooth Watercolor Paper 100lb)
Ink: Time Holtz Distress Ink (Flowers - Spiced Marmalade, Forest Moss, & Black Soot) (Card base - Crushed Olive, Cracked Pistachio, Broken China, Tumbled Glass, Wilted Violet), Sentiment -Hero Arts/Hero Hues (Black) 
My Creative Time Products
Just Because (NEW)

Today's Giveaway

Today's sneak set will be given to one lucky winner! All you need to do, for a chance to win, is leave a comment on each blog. You are not required to leave a comment on each blog, but the more comments you leave, the better your chance. Please make sure that you leave your contact info, so Emma can contact you if you win. The winners will be announced on Emma's blog each day.

To see more sneak peaks, click here.

I hope you have a wonderful day!